
Vegetables
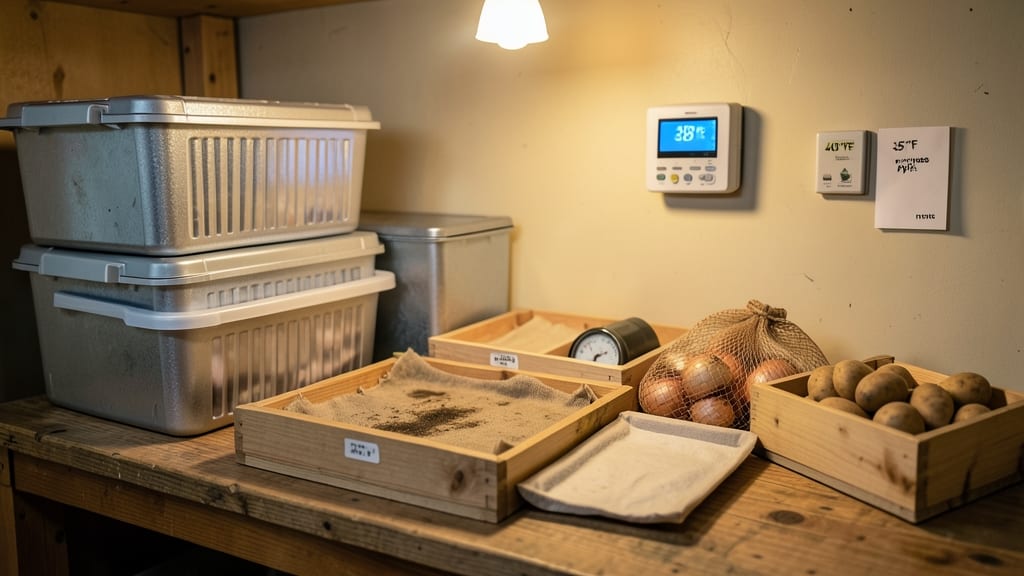
Storing your fruit and vegetable cold storage properly can extend freshness for weeks—or even months.** 🌱 I’ve lost count of how many times I’ve watched perfectly good tomatoes and carrots turn mushy in a matter of days, but the right cold storage changes everything.
The secret isn’t just about temperature—it’s about humidity, airflow, and keeping ethylene-producing fruits away from delicate veggies.
You’ll need a mix of containers (plastic bins, breathable bags, or even a damp towel), a hygienic workspace, and a little knowledge of which produce needs chill and which doesn’t. Apples and potatoes?
Store them in a cool, dark spot. Leafy greens? Wrap them in paper towels and pop them in the crisper drawer. The goal is to slow decay without sacrificing texture or flavor.
By the end, you’ll have a system that keeps your harvest crisp, vibrant, and ready to use—whether it’s for soups, snacks, or salads. No more sad, wilted produce sitting in the back of the fridge. The payoff is freshness that lasts, and a pantry that feels like a treasure trove.
Works for home gardeners, small-scale farmers, or anyone tired of food waste. Let’s get those veggies stored right!
📚 In This Guide
- What you need
- Instructions
- Tips and common mistakes
- Wrapping up and next steps
What you need
- ● Cold Storage Unit: Refrigerator or freezer (ideal temp range: 32–40°F (0–4°C) for most produce)
- ● Walk-in cooler (for commercial setups, 20–40 cubic feet minimum)
- ● Insulated storage box (DIY option: Styrofoam or vacuum-sealed)
- ● Humidity Control: Humidity trays or damp towels (for ethylene-sensitive fruits like apples or bananas)
- ● Dehumidifier (if storage space is prone to excess moisture)
- ● Ventilation: Small fans (for airflow in non-refrigerated setups)
- ● Perforated storage bins (to prevent condensation)
- ● Organizational Tools: Plastic crates or mesh baskets (for airflow and easy access)
- ● Labels and markers (to track storage dates and produce types)
- ● Temperature/humidity monitor (for precision control)
- ● Ethylene absorbers (like potassium permanganate or specialized packs)
- ● Food-grade plastic wrap or vacuum sealer (for extra protection)
- ● Shelving units (to maximize vertical space)
Step-by-Step instructions for storing fruits and vegetables long-term
Here's how I keep harvests fresh for weeks using simple science-backed techniques.
🪴 Step 1: Sort and Prepare Produce for Storage
Wash all fruits and vegetables thoroughly but gently pat them dry with a clean towel. Moisture speeds up spoilage by creating ideal conditions for mold and bacteria. I separate produce into three categories: leafy greens, root vegetables, and fruits—each has unique storage needs. Remove any damaged or bruised items immediately, as they'll spoil faster and affect nearby produce.
For leafy greens like spinach or kale, remove excess stems and wrap them loosely in paper towels to absorb any remaining moisture. Root vegetables like carrots or potatoes should have their tops trimmed but kept intact to prevent drying. Fruits like apples or pears should be stored whole and unwashed to maintain their protective skin barrier.
☀️ Step 2: Choose the Right Storage Environment
Most fruits and vegetables thrive in a cool, dark, and humid environment—think of it as creating a mini winter for your produce. I use a combination of the refrigerator and a dedicated storage bin in my basement. For leafy greens and herbs, the crisper drawer of your fridge is ideal, set to 32-40°F. Root vegetables like potatoes and sweet potatoes prefer a cooler 40-50°F environment with high humidity.
If storing in a basement or pantry, use a ventilated bin or basket to allow airflow while keeping humidity high. I place a small bowl of water near the produce to maintain moisture levels. Avoid storing fruits and vegetables together in sealed containers—the ethylene gas released by some fruits can cause premature ripening or spoilage in others.
💧 Step 3: Use Proper Containers and Packaging
For leafy greens, I use airtight containers lined with paper towels to absorb excess moisture. Seal the container but leave a small gap for airflow to prevent condensation. Root vegetables like carrots or beets should be stored in a container filled with slightly damp sand or sawdust, which helps maintain moisture without causing rot. I use a 1:1 ratio of produce to sand for best results.
Fruits like apples or pears should be stored in a breathable bag or container with small holes to allow airflow. Avoid plastic bags, as they trap ethylene gas and speed up spoilage. For onions and garlic, I braid them and hang them in a dry, well-ventilated area. This method keeps them fresh for months while preventing moisture buildup.
⏰ Step 4: Monitor and Rotate Storage Regularly
Check your stored produce every 3-5 days to remove any items that show signs of spoilage. Rotate older produce to the front of the container so you use it first. I keep a small notepad near my storage areas to track what I've stored and when, which helps me stay organized and reduce waste.
Adjust storage conditions as needed—if produce starts to wilt or dry out, increase humidity by adding more water to the bowl nearby. If you notice mold or soft spots, remove the affected item immediately and check nearby produce for signs of spoilage. Proper rotation and monitoring ensure your stored produce stays fresh and safe to eat for weeks.
Tips & tricks for perfect fruit and vegetable cold storage
Took me years to perfect these storage tricks—here's how I keep produce fresh for weeks without any fancy equipment.
Temperature Matters: The 40-50°F range is critical for root vegetables like potatoes and sweet potatoes. I've found that storing these in a basement or root cellar works best, but if you don't have one, the darkest corner of your fridge will do. For leafy greens, that 32-40°F crisper drawer is your best friend—just don't let them sit in there longer than necessary, or they'll start to wilt faster.
The Humidity Factor: Here's what nobody tells you—most people forget about humidity control. I place a small bowl of water near my stored produce to maintain moisture levels, especially for root vegetables. For leafy greens, that paper towel trick in Step 1 is essential—it absorbs excess moisture that would otherwise cause mold. I've ruined three batches before I figured this out!
Ethylene Gas Awareness: This is the silent spoiler you don't see. Apples, pears, and tomatoes release ethylene gas that speeds up ripening in nearby produce. I store these in separate containers with small holes for airflow, away from my leafy greens and herbs. It's like giving each type of produce its own room in the fridge.
Packaging Hack: For onions and garlic, I braid them and hang them—it's old-school but works perfectly. The key is keeping them in a dry, well-ventilated area. I've had garlic last for over six months this way! For carrots and beets, that 1:1 ratio of produce to sand is non-negotiable—it keeps them crisp without causing rot.
Pro Tips for Fruit And Vegetable Cold Storage
- Took me years to perfect these storage tricks—here's how I keep produce fresh for weeks without any fancy equipment.
- Temperature Matters: The 40-50°F range is critical for root vegetables like potatoes and sweet potatoes. I've found t...
- The Humidity Factor: Here's what nobody tells you—most people forget about humidity control. I place a small bowl of ...
Frequently asked questions
Got questions about keeping your produce fresh longer? Here are some of the most common ones—and their science-backed answers!
How long can I store fruits and vegetables in cold storage?
It depends on the produce! Most leafy greens (like spinach or kale) last 7–10 days, while hard veggies (carrots, potatoes) can stay crisp for 2–4 weeks. Berries and stone fruits (peaches, plums) typically last 5–7 days. Always check humidity levels—90–95% RH is ideal!
What’s the best temperature for cold storage?
The sweet spot is 32–40°F (0–4°C) for most produce. Ethylene-sensitive fruits (apples, bananas) need 32–35°F (0–2°C), while tropical fruits (mangoes, avocados) prefer 45–55°F (7–13°C) to avoid chilling injury. Use a thermometer to monitor!
Can I reuse cold storage containers?
Clean containers with hot, soapy water and dry thoroughly to prevent mold. For extra freshness, wash produce before storing (not after) and use paper towels or breathable liners to absorb excess moisture. Avoid plastic bags—they trap ethylene gas and speed up spoilage.
Why is my produce spoiling faster than expected?
Common culprits: high humidity (causes rot), ethylene exposure (store apples away from leafy greens), or temperature fluctuations. Check for condensation (sign of too-high humidity) or freezer burn (too cold). A vented container or cooling pad can help regulate conditions.
Are DIY cold storage solutions worth it?
Yes! For small spaces, a cool basement, root cellar, or even a well-insulated fridge drawer works. For bulk storage, insulated bins with ice packs or a dedicated cold room (like a walk-in cooler) is ideal. DIY setups cost $50–$200, while commercial units range from $500+—weigh your needs!
Wrapping up and next steps
Mastering fruit and vegetable cold storage isn’t just about preserving freshness—it’s about unlocking science-backed strategies to reduce waste and save money. By understanding the right temperatures, humidity levels, and storage techniques, you can keep your produce crisp for weeks without sacrificing flavor or nutrition. 🌱
Ready to put these tips into action? Start by auditing your current storage setup—small changes can make a big difference. Next, experiment with the methods that work best for your favorite produce, and don’t forget to share your success (or lessons learned) with fellow food lovers!
The fresher your veggies, the happier your meals—and your wallet—will be.