
Fertilization
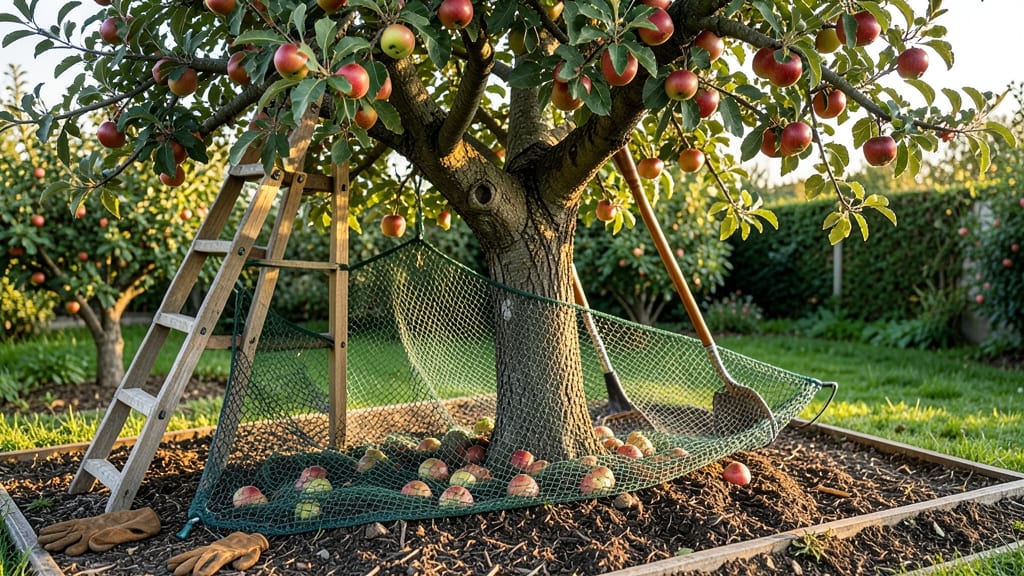
My fruit-catching net saved last year's apple harvest from being gobbled up by squirrels and scattered by wind. 🌱 These lightweight nets create a protective barrier that keeps fruits safe from pests, birds, and even falling branches while letting sunlight and rain through—no more bruised produce or lost harvests.
Choosing the right net depends on your fruit type: fine-mesh (1/4-inch) works for berries, while heavier-duty (1/2-inch) supports apples and pears. Look for UV-resistant materials to prevent fraying, and opt for elastic edges or stakes for easy installation.
Most nets cover 6x8 feet and weigh under 2 pounds, making them simple to hang or drape.
Installation takes just 10 minutes—wrap the net loosely over branches or drape it like a tent, securing it with clips or stakes. Avoid pulling too tight, or you’ll restrict airflow. Once in place, you’ll watch fruits ripen undisturbed, ready for clean, pest-free picking when the time comes.
For maintenance, shake off debris after rain and store nets when not in use to extend their life. If you’re on a budget, DIY with chicken wire or row covers—just ensure the holes are small enough to block pests.
The key? Timing—install nets before fruits form to maximize protection.
📚 In This Guide
- What you need
- Instructions
- Tips and common mistakes
- Wrapping up and next steps
What you need
- ● Netting: 1 roll of polypropylene or UV-resistant fruit netting (width: 4–6 ft, length: 20–50 ft, depending on tree size and coverage needs). Mesh size: 1/2"–3/4" to deter pests like birds and squirrels.
- ● Support Structures: 4–6 T-posts or wooden stakes (5–6 ft tall, 1–2 inches in diameter).
- ○ Optional: Galvanized metal stakes for durability in windy areas.
- ● Fasteners: Zip ties or nylon cable ties (50–100, depending on net size).
- ● OR Heavy-duty staples (if attaching to a frame).
- ● Measuring Tools: Tape measure (10–25 ft).
- ● Chalk or marker (for marking netting).
- ● Basic Tools: Scissors or utility knife (for cutting netting).
- ● Hammer or mallet (for driving stakes).
- ○ Optional: Staple gun (if using staples instead of zip ties).
- ● Safety Gear: Gloves (to protect hands while handling netting or stakes).
- ● Safety goggles (if cutting netting with a knife).
- ● Prerequisites: Access to a ladder or step stool (if trees are tall).
- ● Clear weather for setup (avoid windy or rainy days).
How to install a fruit-catching net for hassle-free harvesting
Skip the ladder and the bruised fruit—here's how to set up a net that makes picking apples, peaches, and berries a breeze.
🪴 Step 1: Choose the Right Net and Location
Select a net with 1-inch mesh or smaller to prevent fruit from slipping through while allowing rainwater to drain. For small trees or bushes, a 4x6-foot net works perfectly. Larger orchards may need 8x10-foot sections sewn together or secured with heavy-duty clips. Position the net under the heaviest fruit-bearing branches—this is where the bulk of your harvest will land.
I always install mine before the first fruit sets in early spring. This gives you time to adjust positioning as branches grow. Avoid placing the net directly under the trunk, where fallen fruit might rot and attract pests. Instead, angle it slightly outward to create a natural funnel effect.
🌿 Step 2: Secure the Net Properly
Use galvanized staples or heavy-duty clips to attach the net to the tree branches. Start at the outer edges of the canopy and work your way inward, ensuring the mesh lies flat without gaps. For larger trees, you may need additional support poles—drive them into the ground at 45-degree angles and drape the net over them before securing.
Check the tension weekly. A sagging net won’t catch fruit effectively, and a too-tight net can tear when branches sway in the wind. Adjust as needed, especially after rain or strong winds. I like to tie brightly colored ribbons to the corners of the net so I can spot it easily from a distance.
✂️ Step 3: Train Branches for Optimal Fruit Drop
Gently guide low-hanging branches toward the center of the net by tying them with soft plant ties (avoid wire or anything that can damage bark). This ensures fruit falls straight down rather than rolling away. For trees with horizontal branches, you might need to prune slightly to encourage downward growth—just remove a few 1-inch sections from the tips to promote bushier, fruit-bearing branches.
Don’t over-prune, though. You’re not shaping the tree—just nudging it to drop fruit where the net will catch it. I usually do this in late winter or early spring, before the tree’s active growth phase begins. Avoid pruning during hot or dry periods, as stress can reduce fruit set.
💧 Step 4: Maintain the Net Through the Season
After each rain, shake the net gently to redistribute any trapped water and prevent mold. Fruit left sitting in damp mesh can develop rot, especially in humid climates. I also rotate the net every 2-3 weeks to prevent uneven wear and tear—just loosen the clips, flip it, and reattach.
Keep an eye out for pests like rodents or birds that might try to nest in the net. A few scattered pine cones or fake owls placed nearby often deters them without harm. If you notice fruits punctured or missing, reinforce the net with sturdier clips or add a second layer in problem areas.
⏰ Step 5: Harvest and Store with Ease
When fruit is ripe, gather it directly from the net—no more climbing or dropping produce. I like to harvest in the early morning when temperatures are cooler, which preserves freshness longer. Use a soft basket or mesh bag to transfer fruit from the net to storage to avoid bruising.
After harvest, remove the net and store it in a dry place until next season. Give it a once-over with a stiff brush to remove debris, and fold it neatly to prevent snags. I keep mine in a ventilated plastic bin with a few cedar blocks to repel insects naturally. With proper care, a good net lasts 5-7 years before needing replacement.
Tips & tricks for perfect fruit-catching net setup
Here's what nobody tells you about getting the most out of your fruit-catching net—these tricks will save you time and frustration this season.
Mesh Size Matters: While 1-inch mesh works for most fruits, berries like strawberries or blueberries need ½-inch mesh to prevent slipping through. I've learned this the hard way after watching my harvest roll away during windy days! For mixed orchards, consider using a removable smaller-mesh panel over the berry sections when those fruits are ripe.
Seasonal Timing Secret: Install your net before bud break in early spring—not after fruit sets. This gives you the flexibility to adjust positioning as branches grow. I mark my calendar for late February to early March in my climate zone, but check your local frost dates to time it perfectly. The earlier you install, the more you'll catch!
Branch Training Hack: For trees with horizontal branches, the trick is to create a slight downward angle by gently bending branches toward the net. Use soft plant ties to secure them without damaging the bark. I've found that removing just 1-inch sections from branch tips (as mentioned in Step 3) encourages new growth that naturally angles downward, making future harvests even easier.
Pest Prevention Strategy: Beyond fake owls and pine cones, I've had great success with hanging reflective tape near the net edges. The flashing movement scares off birds without harming them. For rodents, place a few peppermint oil-soaked cotton balls in the net corners—the scent deters them naturally and doesn't require toxic chemicals.
Pro Tips for Fruit Catching Net
- Here's what nobody tells you about getting the most out of your fruit-catching net—these tricks will save you time an...
- Mesh Size Matters: While 1-inch mesh works for most fruits, berries like strawberries or blueberries need ½-inch mesh...
- Seasonal Timing Secret: Install your net before bud break in early spring—not after fruit sets. This gives you the fl...
Frequently asked questions
Got questions about making fruit harvesting easier with a fruit-catching net? You’re not alone! Here are answers to the most common queries to help you get started—and keep your orchard (or garden) running smoothly.
What’s the best time of year to install a fruit-catching net?
Aim to install your net before fruits ripen—typically in late spring to early summer, depending on your climate and fruit type. For example, apple and pear nets go up in May-June, while berry nets may need an earlier setup (April). Check your fruit’s bloom time for a head start!
Can I reuse a fruit-catching net year after year?
High-quality nets (like those made from UV-resistant polyester) can last 5+ years with proper care. Rinse off debris after harvest, store in a dry place, and avoid sharp edges that could tear the mesh. A little TLC keeps them ready for next season’s bounty.
What’s a good alternative if I don’t want to use a net?
If nets aren’t your style, try these options:
- Harvest bags: Individual mesh bags tied to branches to catch fruit as it ripens.
- Tarpaper or fabric sheets: Drape under trees (secured with clips) to collect fallen fruit.
- Hand-picking: Works for small orchards but can be labor-intensive for heavy crops.
Why is my fruit still falling even with a net in place?
Fruit might still drop due to:
- Overripe or diseased fruit (check for rot/spots).
- Net gaps—ensure it’s snug against branches with no holes larger than 1 inch.
- Wind or heavy branches—reinforce supports if needed.
Are DIY fruit-catching nets cheaper than buying pre-made ones?
DIY nets (using hardware cloth or poultry netting) can save 30–50% upfront, but pre-made nets often last longer and fit better. Factor in your time vs. cost: A $20–$40 net might pay off in fewer headaches during harvest season. For large orchards, bulk DIY might still win!
Wrapping up and next steps
A fruit-catching net is your secret weapon for stress-free harvesting—whether you're a backyard gardener or a small-scale orchard owner! 🌳 With the right materials and a little DIY know-how, you can transform fallen fruit into easy-to-pick bounty, reducing waste and saving your back.
The best part? It’s a simple, cost-effective upgrade that pays off season after season.
Ready to take the next step? Grab your supplies, follow the steps, and enjoy the ease of effortless fruit collection. Your future self—and your fruit trees—will thank you! 🍎✨