
Fertilization
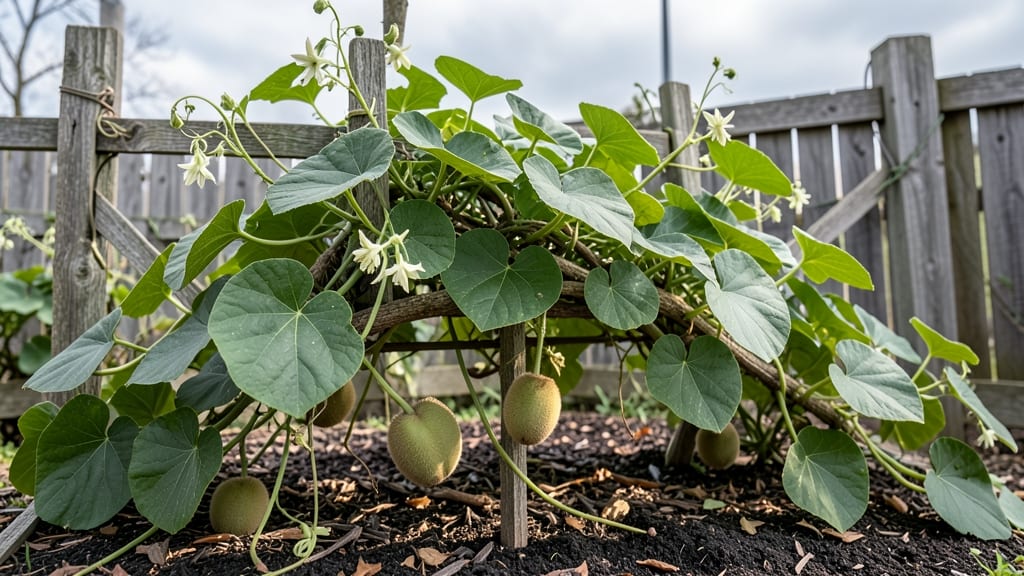
Growing kiwi fruit isn't just about vines—it's about year-round harvests that turn your backyard into a tropical oasis. 🌿 I learned the hard way that these vigorous climbers need more than just good soil; they demand a strong trellis system, patient pruning, and just the right balance of sun and shade.
My first attempt ended with tangled vines and no fruit, but now I’ve cracked the code for consistent, delicious kiwi production—even in cooler climates.
The secret starts with Actinidia deliciosa (the fuzzy-skinned classic) or Actinidia arguta (the smooth, hardy variety), both of which thrive on T-shaped trellises or sturdy pergolas. You’ll need well-draining soil, 6-8 hours of sunlight, and a male-female vine pairing for pollination—unless you’re growing self-pollinating Arctic Kiwi varieties.
The vines grow 20+ feet if left unchecked, so pruning in late winter is non-negotiable if you want manageable plants and heavy fruit sets.
By summer, you’ll see the magic unfold: glossy green fruits swelling on the vines, sweetening as they ripen. The key is consistent watering (1-2 inches per week) and a balanced fertilizer in early spring to fuel growth.
Organic growers can use compost tea or fish emulsion, while conventional methods might call for a 10-10-10 blend—just avoid over-fertilizing, or you’ll get leafy vines and no fruit.
With the right setup, your first harvest could be as early as year two, and with proper care, these vines will keep producing for decades.
Now, here’s the plot twist: kiwi vines are perennial powerhouses, but they need winter protection in colder zones (think mulch or row covers). And yes, those fuzzy skins are edible—don’t let them scare you off.
Whether you’re growing for fresh eating, jams, or just the joy of watching vines climb, this is a project that pays off in bold flavors and lush greenery. Let’s get those vines trained!
📚 In This Guide
- What you need
- Instructions
- Tips and common mistakes
- Wrapping up and next steps
What you need
- ● Kiwi Vine Plants: 2-4 Actinidia deliciosa vines (male and female plants required for pollination). Female vines produce fruit, while male vines pollinate them.
- ● Choose disease-resistant varieties like Hayward or Zespri Gold for optimal yields.
- ● Soil & Fertilizers: Well-draining, slightly acidic soil (pH 5.5–6.5). Amend with compost or organic matter if needed.
- ● Balanced fertilizer (10-10-10 or 5-10-10 NPK ratio) for planting and seasonal growth.
- ● Slow-release organic fertilizer (e.g., fish emulsion or worm castings) for ongoing nutrition.
- ● Support Structures: Strong trellis, arbor, or pergola (at least 10–15 feet tall) for vines to climb.
- ● Twine or soft plant ties (1–2 inches wide) to secure vines as they grow.
- ● Watering Supplies: Drip irrigation system or soaker hoses (kiwi vines need consistent moisture, especially during fruiting).
- ● Water storage (e.g., rain barrels) for drought-prone areas.
- ● Pruning Tools: Sharp bypass pruners (for clean cuts).
- ● Loppers (for thicker branches).
- ● Gloves (to protect hands from thorns).
- ● Mulch (straw or wood chips) to retain soil moisture and suppress weeds.
- ● Frost cloth or row covers for young plants in cold climates.
- ● Pest control (neem oil or insecticidal soap for aphids/mites).
- ● Soil pH test kit to monitor and adjust acidity levels.
- ● Pollination aids (e.g., a small brush) if bees are scarce in your area.
Step-by-step instructions for growing kiwi vines
Here's how I've grown thriving kiwi vines with consistent harvests—no greenhouses required.
🌱 Step 1: Select the Right Vine and Planting Site
Choose a hardy kiwi variety like 'Issai' (self-fertile) or 'Hayward' (needs a pollinator vine). Kiwi vines thrive in USDA zones 5-9 with 6-8 hours of sunlight daily. The secret to success starts with a sturdy trellis system—I use a 12-foot tall T-post trellis with horizontal wires spaced 18 inches apart for vertical growth. Plant vines in well-draining soil with a pH of 5.5-6.5—kiwi roots hate soggy conditions.
Dig a hole twice as wide as the root ball but only as deep as the container it came in. Mix 2 cups of compost into the native soil to boost fertility. If your soil is heavy clay, amend with 5 gallons of sand to improve drainage. The key is getting the roots established before the first frost—plant in early spring when soil temperatures reach 60°F.
☀️ Step 2: Train Vines and Provide Support
Kiwi vines are aggressive climbers, so prune early to direct growth. In the first year, select 2-3 strong canes and tie them to the lowest trellis wire using soft jute twine. Avoid metal ties—they cut into tender vines. As the vines grow, weave them horizontally along each wire, securing them every 12 inches to prevent wind damage. This creates a fan-shaped canopy that maximizes sunlight exposure for fruit production.
Here's the thing—kiwi vines need space. Space plants 15-20 feet apart to allow for full growth. If you're growing multiple vines, plant male and female varieties (if not using self-fertile 'Issai') within 30 feet of each other for cross-pollination. Watch for suckers (shoots growing from the base)—remove them immediately to focus the vine's energy on fruit-bearing canes.
💧 Step 3: Water and Fertilize for Maximum Yield
Kiwi vines are thirsty but hate wet feet. Water deeply once a week during the first growing season, soaking the soil to a depth of 12 inches. You'll know it's right when water runs out of the drainage holes. In summer heat, increase to twice weekly but check soil moisture first—stick your finger 2 inches deep. If it feels dry, water; if damp, wait. Overwatering causes root rot, which kills vines faster than you can say "kiwi harvest."
Feed vines with a balanced 10-10-10 fertilizer in early spring and again after harvest. I also top-dress with 3 cups of compost around the base in late fall to build soil fertility for next year. Kiwi vines are heavy feeders, so don't skimp—healthy vines produce more and larger fruit. If leaves turn yellow between veins, that's a sign of magnesium deficiency—apply Epsom salt (1 tablespoon per gallon of water) every 2 weeks until foliage greens up.
✂️ Step 4: Prune for Fruit Production and Winter Hardiness
Pruning is where kiwi vines reveal their secrets. In late winter or early spring, cut back last year's canes by one-third to encourage new growth. Remove weak, crossing, or diseased canes first—they compete with healthy growth. Leave 2-3 strong canes per vine, pruning them back to 4-5 buds. This forces energy into fruit-bearing wood. I always prune on a dry, sunny day to reduce disease risk.
In summer, do a light pruning to open up the canopy. Remove any shoots growing downward—kiwi vines only produce fruit on horizontal canes. Thin out overcrowded branches to improve airflow, which prevents fungal diseases like powdery mildew. If you see flower clusters, don't panic—kiwi flowers are perfectly normal, even if they don't all set fruit. The vine is preparing for next year's harvest.
🍈 Step 5: Harvest and Prepare for Next Season
Kiwi fruit is ready to pick in late summer to early fall, depending on the variety. 'Hayward' kiwis typically ripen in September-October, while 'Issai' may fruit earlier. Look for plump, slightly soft fruit that pulls away from the vine easily. The skin should be bright green (not brown or shriveled). I harvest by twisting gently—don't cut the stem, as this can damage the vine.
Kiwi fruit won't ripen on the vine, so store harvested fruit in a cool, dark place (like a basement) until fully ripe. To prepare for winter, mulch the base with 3 inches of straw to insulate roots. If you're in zone 5 or colder, wrap young vines in burlap and cover with frost cloth during hard freezes. Kiwi vines are perennial, but young plants need protection until established. With proper care, your vine will reward you with harvests for decades.
Tips & tricks for growing thriving kiwi vines
Real talk: Growing kiwi vines isn't just about planting a vine and hoping for the best. These are the nitty-gritty details that separate a struggling plant from a fruit-bearing powerhouse.
Site Selection Strategy: The 6-8 hours of sunlight requirement is non-negotiable, but here's what nobody tells you—morning sun is more important than afternoon. Kiwi vines need gentle warmth to wake up their growth hormones first thing, so position your trellis to catch those early rays. Also, avoid planting near large trees; their roots will compete aggressively for water and nutrients, leaving your vine thirsty and malnourished.
Trellis Construction Insight: That 12-foot tall trellis isn't just for show—it's about creating the perfect growing environment. The 18-inch spacing between wires is crucial because kiwi vines develop fruit along the canes. Too close, and airflow suffers; too far, and you lose potential fruiting zones. I've found that adding a third wire at 6 feet helps support the vine's weight as it matures, preventing sagging that can stress the plant.
Soil Preparation Secret: The 2 cups of compost you mix into the planting hole is just the beginning. For heavy clay soils, I've had success adding an extra 5 gallons of coarse sand to the bottom of the hole before backfilling. This creates a drainage layer that prevents waterlogging while still allowing roots to establish. The soil pH of 5.5-6.5 is critical—test your soil before planting and adjust with lime if needed, as kiwi roots simply won't thrive in alkaline conditions.
Watering Wisdom: Those 12 inches of deep watering aren't just about quantity—they're about quality. I've learned to water in the morning so the foliage has all day to dry, preventing fungal diseases that thrive in damp conditions. In summer, when you're watering twice weekly, consider using drip irrigation to deliver water directly to the roots without wetting the leaves. This simple adjustment can cut down on disease pressure significantly.
Pro Tips for How Is Kiwi Fruit Grown
- Real talk: Growing kiwi vines isn't just about planting a vine and hoping for the best.
- Site Selection Strategy: The 6-8 hours of sunlight requirement is non-negotiable, but here's what nobody tells you—morning sun is more important than afternoon.
- Trellis Construction Insight: That 12-foot tall trellis isn't just for show—it's about creating the perfect growing environment.
Frequently asked questions
Got questions about growing kiwi fruit? You’re not alone! Here are some of the most common queries—plus straightforward answers to help you cultivate a thriving vine.
How long does it take for a kiwi vine to produce fruit?
A kiwi vine typically takes 3–5 years to bear fruit after planting. Patience is key—young vines focus on root and vine growth before flowering. Choose fast-maturing varieties like Issai (self-pollinating) for earlier harvests (2–3 years).
Can kiwi vines survive cold winters?
Most kiwi varieties (e.g., Hayward) thrive in USDA Zones 7–9 and need winter protection in colder climates. Use mulch, frost blankets, or grow them against a south-facing wall. Hardy varieties like Arctic Kiwi tolerate Zone 5 with proper care.
Why aren’t my kiwi flowers turning into fruit?
Common culprits include:
- Lack of pollination: Kiwis need cross-pollination (plant male and female vines). Issai vines are self-pollinating.
- Young vines: Wait until the vine is 3+ years old.
- Poor nutrition: Add phosphorus-rich fertilizer (e.g., bone meal) to encourage flowering.
- Extreme weather: Frost or heatwaves can damage blooms.
Are there kiwi alternatives for small gardens?
Yes! Try these space-saving options:
- Dwarf kiwi varieties: Saichiki (compact, self-pollinating).
- Container growing: Use large pots (15+ gallons) with trellises.
- Hardy kiwi: Actinidia arguta (smaller fruit, cold-hardy).
- Strawberries or grapes: Similar care needs but faster yields.
What pests or diseases should I watch for?
Kiwi vines face threats like:
- Psyllids: Sap-sucking insects causing leaf curl. Treat with neem oil.
- Root rot: Overwatering or poor drainage. Ensure well-draining soil.
- Powdery mildew: Fungal disease in humid climates. Prune for airflow and spray sulfur.
- Birds/squirrels: Protect fruit with netting once ripe.
Wrapping up and next steps
Growing kiwi fruit is a rewarding journey that blends patience, care, and a touch of tropical flair! 🌱 From selecting the right vines to mastering fertilization and pruning, each step plays a crucial role in unlocking those sweet, vibrant fruits.
With the right knowledge and dedication, you can enjoy year-round harvests—whether you're a backyard gardener or a small-scale farmer.
Ready to take the next step? Start by planting your first vines this season or experiment with container growing if space is limited. And remember: every expert gardener began with a single seed (or vine!). Happy growing! 🌟