
Pests
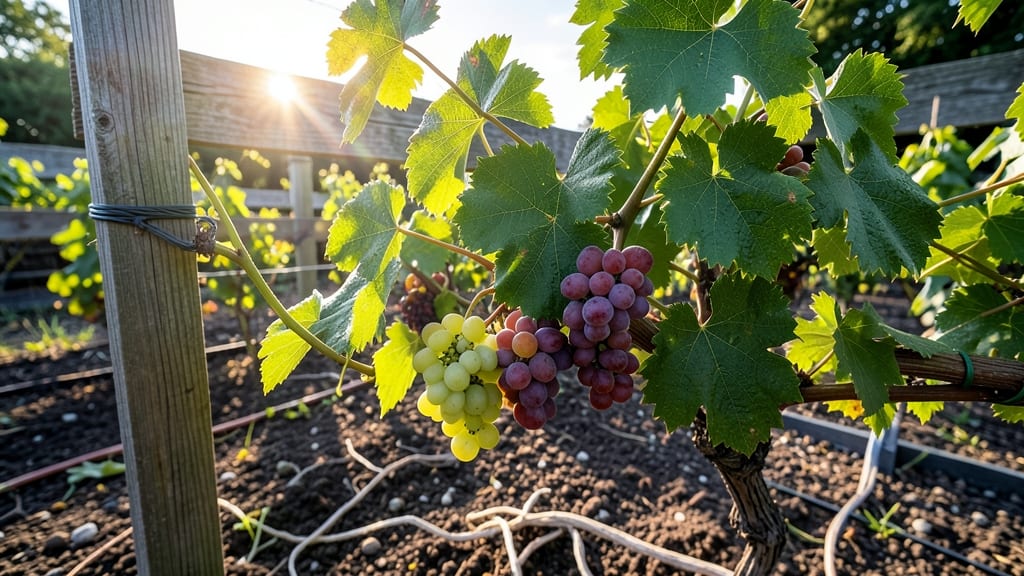
Getting grape vines to produce fruit starts with one simple truth: pruning right is everything. 🌿 I’ve watched vines struggle for years—until I learned the exact cuts that trigger fruit production instead of just leafy growth.
The difference between a handful of grapes and a cluster-heavy vine comes down to timing, technique, and a little patience. Most gardeners over-prune or under-prune, and both mistakes lead to the same result: no fruit.
You’ll need sharp pruners, a sunny spot with at least 6-8 hours of light, and a well-draining soil mix rich in organic matter. The key is shaping the vine during dormancy (late winter) to encourage fruit-bearing canes while removing last year’s wood.
By summer, you’ll see the payoff: thick clusters of grapes instead of sparse berries. The vines will look fuller, the fruit sweeter, and you’ll finally understand why your neighbors’ vines are always bursting with harvests. Here’s how to make it happen—step by step.
This works for both table grapes and wine grapes, whether you’re growing on an arbor, trellis, or fence. The same principles apply, no matter your setup. Let’s get those canes trimmed for a harvest you’ll actually enjoy.
📚 In This Guide
- What you need
- Instructions
- Tips and common mistakes
- Wrapping up and next steps
What you need
- ● Grapevine cuttings or young plants: Disease-resistant varieties (e.g., Concord, Thompson Seedless, or Cabernet Sauvignon) from a reputable nursery. Quantity: 1-2 vines per 10 sq ft of trellis space.
- ● Pruning shears: Sharp, bypass-style shears (avoid anvil shears—they crush stems). Spec: 6-8" blades for precision.
- ● Grafting tape or rubber tree wrap: For sealing cuts (if grafting). Spec: 1-inch wide, 100% biodegradable.
- ● Disinfectant (70% isopropyl alcohol or bleach solution): To sterilize tools between cuts. Mix: 1 part bleach to 9 parts water.
- ● Trellis or support structure: Sturdy posts (4x4 wood or metal) and 12-14 gauge wire (for arbor or fan-trained vines). Height: 6-8 ft tall.
- ● Compost or well-aged manure: For enriching soil before planting. Amount: 2-3 gallons per vine hole.
- ● Mulch (straw or wood chips): To retain moisture and suppress weeds. Layer: 2-3 inches thick.
- ● Drip irrigation system or hose with soaker nozzle: For consistent watering. Tip: Water at the base, not the leaves!
- ● Pruning sealant: For large cuts (e.g., Tanglefoot Tree Wound Pruning Seal).
- ● Fungicide (copper-based or neem oil): To prevent powdery mildew or black rot.
- ● Soil test kit: To check pH (ideal: 6.0–6.5) and nutrient levels.
- ● Grafting knife: If you’re experimenting with grafting varieties.
- ● Shade cloth (30-50% coverage): For young vines in hot climates.
Step-by-Step pruning guide for fruitful grape vines
Here’s how I transform woody vines into productive fruit machines—no magic, just smart cuts.
✂️ Step 1: Prune in Late Winter for Structure
Wait until dormant season (just before buds swell) when temperatures stay above 20°F. I use clean, sharp pruners to remove last year’s fruited canes—these are the thick, brown stems that bore last season’s grapes. Cut them back to the base, leaving only 2-3 healthy canes per vine (thicker than a pencil, with smooth bark).
This ensures energy goes to new growth, not dead wood. Look for swollen buds along the remaining canes—these will become this year’s fruit clusters. If a cane has fewer than 12 buds, prune it shorter to encourage stronger growth. Real talk: Over-pruning here means fewer grapes later.
✂️ Step 2: Thin Canes to Balance Fruit and Foliage
After buds break in early spring, inspect the vine. Remove weak or crossing canes—these compete for nutrients and produce poor-quality fruit. Keep only the strongest 4-6 canes (adjust based on vine age: younger vines need fewer). Cut back each remaining cane to 8-12 buds, leaving the strongest buds at the base.
This balance is key: Too many buds = small, tart grapes. Too few = giant but sparse clusters. I pinch off excessive lateral shoots (those tiny side branches) to focus energy on the main fruit clusters. Watch for new shoots emerging from the base—these are called "suckers" and should be removed unless you’re training a new vine.
☀️ Step 3: Summer Pruning for Airflow and Sun
When grapes form (late spring to early summer), do a light trim to improve airflow. Remove any shoots growing inward (they’ll block sunlight and spread disease). Thin clusters so they’re 4-6 inches apart—crowded grapes stay small and underripe. I also cut back excess leaves shading the fruit zone (leave leaves only above the clusters).
This step prevents rot and mildew while maximizing sun exposure. You’ll see larger, sweeter grapes with better color. If your vine produces more fruit than it can handle, remove every other cluster—quality beats quantity here. Don’t skip this; I’ve seen vines double their yield just by opening them up.
⏰ Step 4: Post-Harvest Cleanup for Next Year
After harvest, remove all dead or diseased wood with sterilized pruners (rub with 70% isopropyl alcohol between cuts). Cut back last year’s fruited canes to the base again—this prevents pests from overwintering. I also spray the vine with a copper fungicide (optional but helpful in humid climates) to protect next year’s buds.
This isn’t just about tidying up; it’s preventing next season’s problems. Healthy vines need 3-4 years to reach full production, so patience pays off. Mark your pruning spots with twine or paint if you’re new—it helps track growth patterns year to year.
Tips & tricks for pruning grape vines
Here's what nobody tells you about transforming those tangled vines into fruit-producing powerhouses.
Timing Secret: The 20°F minimum temperature in Step 1 is non-negotiable—buds swell quickly once temps rise above this threshold. I've learned this the hard way after seeing buds burst too early in warmer winters, leaving them vulnerable to frost damage. Mark your calendar for late winter when daytime temps consistently stay above 20°F—this is your sweet spot for pruning. The goal is to cut just before buds start swelling, not after they've already awakened.
Visual Cue for Step 2: When selecting your 4-6 strongest canes, look for ones with smooth, green bark and plenty of swollen buds. Run your thumb along the cane—it should feel firm, not mushy or hollow. Crossed canes are easy to spot when you see them rubbing against each other; these compete for sunlight and nutrients, so remove them completely. I always cut these at the base rather than mid-cane to avoid leaving stubs that can harbor disease.
Summer Pruning Hack: That 4-6 inch spacing between grape clusters in Step 3 isn't arbitrary—it's the perfect distance for sunlight penetration and air circulation. Use a ruler or even a spoon to create consistent spacing. For vines with excessive fruit, I remove every other cluster rather than thinning individual grapes. This might seem drastic, but it prevents overloading the vine and ensures larger, sweeter fruit rather than a massive quantity of small, tart grapes.
Equipment Upgrade: Don't settle for basic pruning shears—get a pair with bypass blades that cut cleanly without crushing stems. I sterilize my tools between each cut using 70% isopropyl alcohol (as mentioned in Step 4), especially when working with diseased wood. For large vines, consider a pruning saw for thicker canes. The cleaner your cuts, the faster the vine heals and the better it produces next season.
Pro Tips for Get Grape Vines To Produce Fruit
- Here's what nobody tells you about transforming those tangled vines into fruit-producing powerhouses.
- Timing Secret: The 20°F minimum temperature in Step 1 is non-negotiable—buds swell quickly once temps rise above this...
- Visual Cue for Step 2: When selecting your 4-6 strongest canes, look for ones with smooth, green bark and plenty of s...
Frequently asked questions
Got questions about coaxing those grape vines into fruiting? You’re not alone—growers often wrestle with the same challenges. Here’s a breakdown of the most common queries, answered straight and simple.
Why isn’t my grape vine producing fruit after a year or two?
Grape vines are perennial, meaning they need patience! Most varieties take 2–3 years to mature and fruit after planting. Focus on establishing a strong root system and proper pruning in the first year—this sets the stage for future harvests. Pro tip: If your vine is young, prioritize healthy growth over fruit production.
What’s the best time of year to prune for fruit production?
Timing is everything! Prune dormant vines in late winter or early spring (just before buds swell) for optimal fruit set. Avoid pruning in fall or summer—this can stress the vine or encourage disease. For warm climates, a light winter prune may suffice, but most growers stick to the classic late-winter schedule. Remember: Clean cuts heal faster!
Pests and diseases are eating my grapes—how do I protect them?
Common culprits like Japanese beetles, aphids, and powdery mildew can sabotage your harvest. Start with preventative care: space vines for airflow, remove debris, and apply organic sprays (neem oil or insecticidal soap) early in the season. For mildew, copper fungicides work wonders. Act fast: Caught early, most issues are manageable!
Can I force my grape vine to fruit faster?
While you can’t rush nature, you can optimize conditions for earlier fruiting. Ensure your vine gets 6+ hours of sunlight daily, well-draining soil, and consistent watering (deep but infrequent). For container-grown vines, use a balanced fertilizer (10-10-10) in early spring. Bonus: Some varieties (like ‘Concord’ or ‘Thompson Seedless’) fruit faster than others—choose wisely!
What if my grape vine only produces leaves or tiny grapes?
This usually signals over-pruning, poor nutrition, or environmental stress. Check your pruning technique—aim to leave 2–4 mature buds per cane (varies by variety). Test your soil’s pH (ideal: 6.0–6.5) and amend with compost or a low-nitrogen fertilizer (like 5-10-10) in spring. Fix it: Adjust pruning next year and monitor for pests.
| Quick Fixes | When to Try |
|---|---|
| Apply Epsom salt (for magnesium deficiency) | Yellow leaves between veins |
| Thin fruit clusters to ½” apart | Overcrowded grapes (small size) |
| Prune for sunlight exposure (open center) | Vine grows leaves but no fruit |
Wrapping up and next steps
Growing fruit on your grape vines is all about patience, precision, and a little extra care!
By mastering proper pruning techniques, ensuring healthy soil and sunlight, and protecting your vines from pests, you’re well on your way to a juicy, homegrown harvest. 🍇 Remember, consistency is key—whether it’s trimming in late winter or monitoring for aphids, each step builds toward that sweet reward.
Ready to take the next step? Start by marking your calendar for this year’s pruning season and keep an eye on your vines’ progress. Soon, you’ll be savoring the fruits of your labor—literally! 🌱