
Pruning
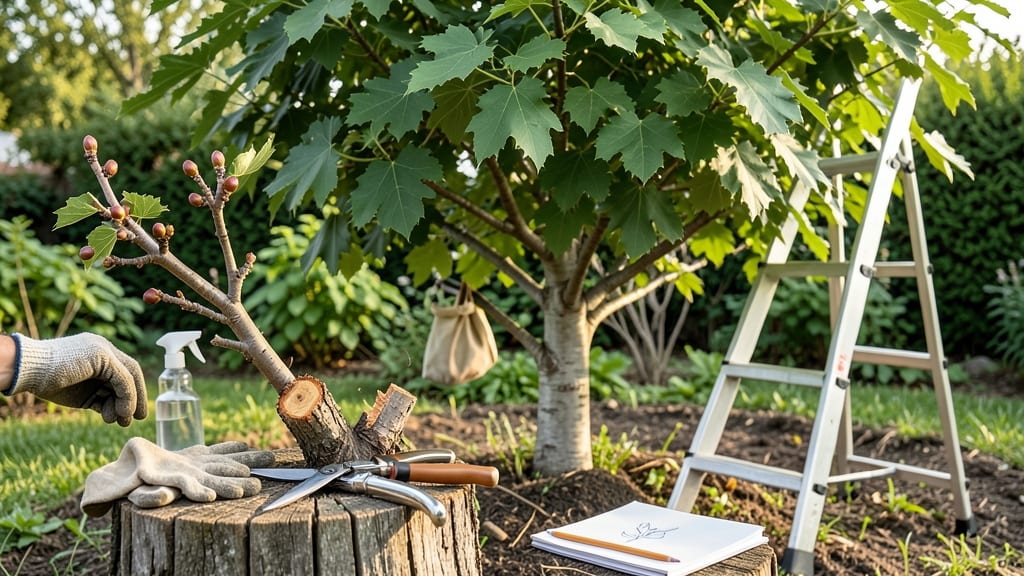
Pruning a fruitless mulberry tree transforms it from unruly to stunning. ✂️ I've spent years shaping mine, and the secret isn't just cutting branches—it's understanding when and how to encourage that dense, glossy foliage that makes these trees so prized.
The right approach keeps your tree healthy, productive in foliage, and free from weak growth that invites pests. The best time to prune is late winter or early spring when the tree is dormant but before new growth starts.
You'll need sharp pruners, a saw for thicker branches, and maybe a ladder—these trees grow fast and can get tall. Start by removing any dead, diseased, or crossing branches first, then thin out the canopy to let light reach the center.
What you'll end up with is a tree that looks like it belongs in a botanical garden, with vibrant green leaves all season long. My tree now has a perfect oval shape that frames my backyard beautifully, and the dense foliage provides shade without the messy fruit drop.
This method works for both young trees you're shaping and mature ones needing renewal. The key is patience—mulberries respond well to gradual pruning over several seasons rather than drastic cuts all at once.
📚 In This Guide
- What you need
- Instructions
- Tips and common mistakes
- Wrapping up and next steps
What you need
- ● Pruning shears – Bypass pruners (sharp, 6-8" blades) for small branches (1/4"–3/4" thick). Quantity: 1 pair.
- ● Pruning saw – Folding handsaw or pruning saw for thicker branches (3/4"–2" diameter). Quantity: 1.
- ● Loppers – Long-handled bypass loppers for medium branches (3/4"–2" thick). Quantity: 1 pair.
- ● Gloves – Heavy-duty, cut-resistant gloves (e.g., leather or Kevlar) to protect from thorns and splinters. Quantity: 1 pair.
- ● Disinfectant – 70% isopropyl alcohol or bleach solution (1 part bleach to 9 parts water) to sterilize tools between cuts. Quantity: Small bottle or spray.
- ○ Sealing wax or pruning paste – Optional but helpful for large cuts (1" or wider) to prevent disease. Quantity: Small tub.
- ● Ladder or step stool – Sturdy, extendable ladder (if tree exceeds 6–8 ft tall). Safety tip: Use a helper or stabilize the ladder on level ground.
- ● Heavy-duty trash bags – For collecting pruned branches. Quantity: 2–3 bags.
- ● Sharpie or marker – To label branches for future reference (e.g., "remove next year").
- ● Pole saw – For high branches without a ladder (extendable, 10–12 ft).
- ● Safety goggles – Protects eyes from debris (especially if sawing thick branches).
- ● Tree wound dressing – Controversial but some swear by it (e.g., Tanglefoot Tree Wound Pruning Seal).
- ● Garden hose or spray bottle – To clean tools mid-pruning and rinse sap off hands.
- ● Camera or phone – Snap photos of the tree’s structure before/after pruning for reference.
Step-by-step instructions for pruning a fruitless mulberry tree
Here's how I keep my mulberry tree lush, productive, and easy to manage year-round.
✂️ Step 1: Prune in Late Winter or Early Spring
This is the best time to tackle major pruning—when the tree is dormant but just before new growth begins. I aim for late February to early March in most climates. The tree's wounds heal faster during this period, and you can see the branch structure clearly without leaves blocking your view.
Start by removing any dead, diseased, or crossing branches first. Use sharp, clean pruning shears to make cuts just outside the branch collar—the swollen area where the branch meets the trunk. This ensures the tree seals the wound properly and prevents rot. If a branch is larger than 2 inches in diameter, use a pruning saw instead.
Look for branches growing inward toward the center of the tree. These compete for sunlight and air circulation, creating a dense, shady interior that invites pests. Cut these back to an outward-facing branch or to the trunk. Remember, you're shaping the tree's future growth pattern, so take your time and make clean cuts.
🌿 Step 2: Thin the Canopy for Better Airflow
Mulberry trees naturally grow dense canopies, which can trap moisture and encourage fungal diseases. I focus on thinning the branches from the inside out—removing about 20-30% of the total branches to open up the center. This improves airflow and sunlight penetration, which means healthier leaves and fruit production.
Start at the bottom of the tree and work your way up. Remove smaller branches first, then tackle larger ones. Aim to create a vase-like shape with a strong central leader. If your tree has multiple leaders (vertical branches), select the strongest one and prune the others back to a lateral branch or to the trunk. This prevents future competition and gives your tree a single, dominant structure.
Watch for branches that are rubbing against each other. These create wounds that can become entry points for diseases. If you can't remove them entirely, prune them back to a point where they no longer touch. This small adjustment can save your tree from long-term damage.
☀️ Step 3: Shape and Maintain Through the Growing Season
After the initial winter pruning, I do light maintenance throughout the growing season to keep the tree looking its best. In early summer, I remove any suckers—those vigorous shoots that sprout from the base or roots. These drain energy from the main tree, so I cut them off at ground level as soon as I spot them.
If your tree starts to look leggy or overgrown, prune back the tips of the branches by about one-third to encourage bushier growth. This is especially useful if you want a more compact tree. Always make your cuts just above a leaf bud or lateral branch. You'll notice new growth emerging from these areas within a few weeks.
In late summer or early fall, do a final light pruning to remove any dead or diseased branches that might have appeared during the growing season. Avoid heavy pruning at this time, as it can stimulate new growth that won't have time to harden off before winter. Instead, focus on cleaning up the tree and removing anything that looks out of place.
⏰ Step 4: Winter Cleanup and Protection
As winter approaches, do a final walk-through to remove any remaining dead wood or branches that could harbor pests or diseases. This is also a good time to apply a thin layer of mulch around the base of the tree to protect the roots from freezing temperatures. Keep the mulch about 2-3 inches deep and extend it out to the tree's drip line.
If you live in an area with harsh winters, consider wrapping the trunk of young trees with tree guard or burlap to protect it from sunscald and rodent damage. Older, established trees usually don't need this protection, but it's worth checking if your tree has any vulnerable spots. I also avoid pruning in late fall or winter unless absolutely necessary, as the tree is less able to heal wounds during these colder months.
Finally, clean up all the pruned branches and debris from the ground. This reduces the risk of disease and pests overwintering in your yard. Store your pruning tools in a dry place and sharpen them before the next pruning season. A well-maintained tree will reward you with lush, healthy growth and fewer problems down the road.
Tips & tricks for perfect fruitless mulberry tree pruning
Real talk: Pruning a fruitless mulberry tree well can transform it from a messy tangle to a showstopper in your landscape. Here's what nobody tells you—these are the details that separate good from great.
Tool Prep is Everything: I learned this the hard way after ruining three branches with dull shears. Always clean and sharpen your tools before starting—sterilize with rubbing alcohol to prevent disease spread. For branches over 2 inches thick, use a pruning saw with a fine-tooth blade to avoid tearing the bark. This makes all the difference when sealing wounds properly.
Branch Collar Matters More Than You Think: The branch collar is that swollen area where the branch meets the trunk, and it's your secret weapon for healing. Never cut flush with the trunk—always leave that collar intact. It contains protective cells that help the tree seal the wound naturally. If you accidentally remove it, you'll likely end up with a slow-healing or infected spot.
Seasonal Timing Secrets: While late winter/early spring is ideal for major pruning, don't skip the growing season maintenance. That one-third pruning of leggy branches in summer? It's not just about looks—it stimulates bushier growth by encouraging lateral buds to wake up. I've seen trees go from sparse to lush in just one season after this simple tweak.
Mulch Depth Makes a Difference: That 2-3 inch mulch layer isn't just decoration—it's insulation for your tree's roots. Too thin, and you're not protecting against temperature swings. Too thick (over 4 inches), and you risk suffocating the roots. I like to fluff the mulch occasionally to maintain proper airflow at the base while keeping it in that sweet spot.
Pro Tips for Prune Fruitless Mulberry Tree
- Real talk: Pruning a fruitless mulberry tree well can transform it from a messy tangle to a showstopper in your lands...
- Tool Prep is Everything: I learned this the hard way after ruining three branches with dull shears. Always clean and ...
- Branch Collar Matters More Than You Think: The branch collar is that swollen area where the branch meets the trunk, a...
Frequently asked questions
Got questions about pruning your fruitless mulberry tree? You’re not alone! Here are answers to the most common concerns—from timing to troubleshooting—to keep your tree thriving without the mess of berries.
When is the best time to prune a fruitless mulberry tree?
Prune your fruitless mulberry tree in late winter or early spring (before new growth starts) for best results. You can also do light shaping in summer after fruiting season (though it’s less ideal). Avoid heavy pruning in fall—it can stimulate weak growth before winter.
How much can I trim back a fruitless mulberry tree?
You can safely remove up to 25-30% of the tree’s canopy in one session, but avoid cutting more than that to prevent stress. For dramatic reshaping, spread pruning over 2-3 years. Focus on removing dead, diseased, or crossing branches first—these should be trimmed anytime they’re spotted.
What if my fruitless mulberry tree isn’t fruitless anymore?
If you notice berries forming, your tree might be reverting to its fruiting variety (common in grafted trees). To fix this, prune out all fruiting branches aggressively and consider root pruning to encourage new growth from the fruitless scion. If the issue persists, consult a local nursery for a certified fruitless cutting.
Can I prune a fruitless mulberry tree in summer?
Yes, but lightly! Summer pruning is best for corrective shaping (e.g., removing water sprouts or suckers) or thinning dense areas to improve airflow. Avoid heavy cuts—this can stress the tree and make it vulnerable to pests. If pruning in summer, do it on a cool, cloudy day to reduce shock.
How often should I prune my fruitless mulberry tree?
Prune once a year (late winter/early spring) for maintenance, plus occasional light trims in summer if needed. Young trees benefit from annual shaping to establish strong structure, while mature trees may only need pruning every 2-3 years for upkeep. Always remove deadwood immediately when you spot it.
Pro Tip:
Use sterilized pruners (wipe with rubbing alcohol) to prevent spreading disease between cuts. Seal larger wounds with pruning sealant (optional but helpful for thick branches) to speed healing. Bonus: Mulch around the base after pruning to retain moisture and reduce stress!
Wrapping up and next steps
Pruning your fruitless mulberry tree is all about timing, technique, and patience—and you’ve got the tools to make it thrive! 🌿 By following the right steps, you’ll encourage lush growth, better airflow, and a stunning shape that’s perfect for hedges or privacy screens.
Remember, consistency is key, so check your tree seasonally and adjust as needed.
Now that you’re armed with knowledge, grab those shears and get pruning! 🌟 For extra confidence, review the FAQs or explore year-round maintenance tips to keep your tree in top form. Happy pruning—your tree (and your garden!) will thank you!