
Trees
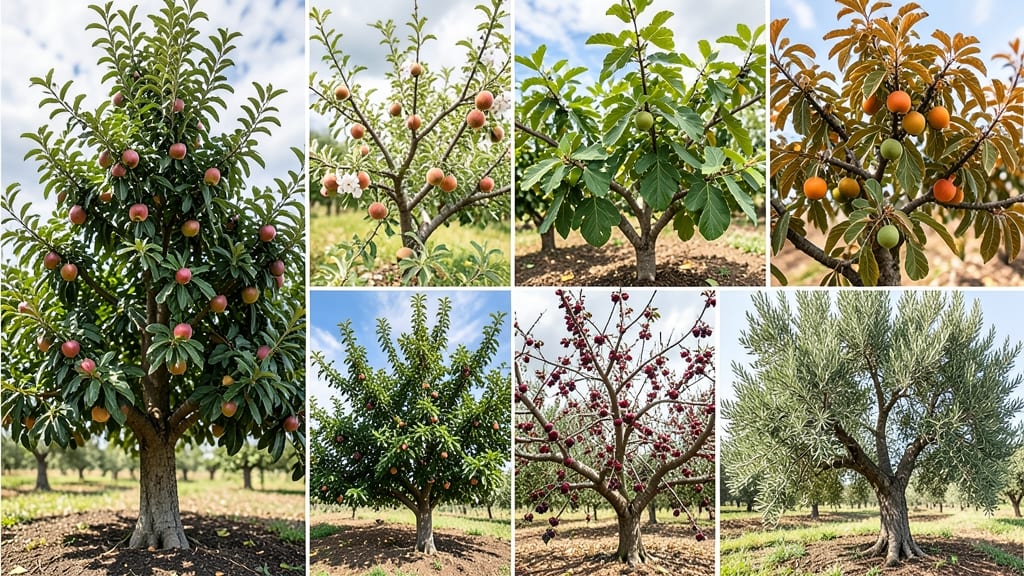
Identifying trees by their fruit is like solving a nature puzzle—once you know the clues. 🌳 I’ve spent years wandering forests and city parks, learning to distinguish between a wild plum and a poisonous lookalike just by examining the fruit, leaves, and twigs.
The key is focusing on three simple traits: shape, color, and when it ripens.
Start with the fruit itself: Is it round like an apple, elongated like a walnut, or clustered like mulberries? Then check the leaves—are they lobed, serrated, or smooth? Twigs hold hidden clues too, like bark texture or bud shape.
For example, a bittersweet vine (toxic) has red berries, while a grape has tight clusters and a sweet scent.
You’ll quickly learn which fruits are safe to eat (like serviceberries or persimmons) and which to avoid (like pokeweed berries or water hemlock). Regional differences matter too—what’s common in the Southeast (like pawpaws) might be rare in the Pacific Northwest.
Grab a field guide or use an app like PictureThis to cross-check your findings, but always double-check with a local arboretum or extension office before tasting anything wild. Confidence comes with practice—and a few near-misses along the way.
📚 In This Guide
- What you need
- Instructions
- Tips and common mistakes
- Wrapping up and next steps
What you need
- ● Field Guide or Tree ID App: 1–2 reliable guides (e.g., Peterson Field Guide to Trees or LeafSnap app for iOS/Android).
- ○ Optional: A printed checklist of common fruit-bearing trees in your region.
- ● Hand Lens or Magnifying Glass: 10x magnification (for examining fine details like seed structures or fruit textures).
- ● Notebook & Pen: For sketching fruits, leaves, and twigs (or use a waterproof version if outdoors).
- ● Camera or Smartphone: With a macro mode or high-resolution camera (40+ MP recommended for close-ups).
- ● Measuring Tape or Ruler: 6-inch (15 cm) minimum, for recording fruit size (e.g., "1 inch diameter").
- ○ Gloves (Optional): Nitrile or latex gloves if handling spiky fruits (e.g., honey locust pods) or toxic berries (e.g., yew).
- ● Pro Tip: 💡 Wear them even for "safe" fruits if you have allergies!
- ● Plastic Bags (Gallon Size): 2–3 reusable bags for storing fruit samples (label each with the tree name/location).
- ● Pruning Shears or Small Knife: For gently snipping branches (avoid damaging the tree!). Sterilize with rubbing alcohol.
- ● Twist Ties or Zip-Lock Bags: For preserving leaf samples (press leaves between paper towels first).
- ● Spray Bottle with Water: To keep samples hydrated if identifying in hot/dry conditions.
- ● GPS Device or Offline Maps: Download Google Maps or Gaia GPS to log tree locations.
- ● First-Aid Kit: Include antihistamines (for allergic reactions) and tweezers (for splinters).
- ● Sunscreen & Bug Spray: SPF 30+ and DEET-free repellent for long field trips.
How to identify trees by fruit using leaf and twig clues
Mastering this skill turns every walk into a discovery—here's how to decode trees like a pro.
🌿 Step 1: Observe Fruit Shape and Size First
Start with the fruit itself—its shape, size, and surface texture are your most reliable clues. A walnut with its rough, ridged husk or a persimmon with its orange, tomato-like skin are unmistakable. Compare your find to common fruits: Are they round like apples, elongated like pears, or clustered like mulberries? Pay attention to whether they're fleshy (like plums) or dry (like acorns).
Note the fruit's attachment point—does it grow alone on a stem or in tight clusters? A single fruit on a long stalk often signals cherry or hawthorn, while tight clusters suggest elderberry or mulberry. I always carry a small notebook to sketch these details when I'm unsure—visual notes beat memory every time.
🌱 Step 2: Examine Leaf Arrangement and Shape
Once you've noted the fruit, move to the leaves—leaf arrangement (how they attach to the twig) narrows it down fast. Alternate leaves (one per node) are common in oak and maple, while opposite leaves (paired at each node) point to dogwood or ash. Compound leaves (multiple leaflets on one stem) often belong to walnut or hickory trees.
Leaf shape matters too: Lobed edges scream oak, while serrated edges suggest hawthorn. I press a few leaves between book pages to preserve them for later comparison—this saves time when you're out in the field. Remember, leaf size varies by species, so take photos of both the leaf and its attachment point for accuracy.
🪴 Step 3: Study Twig and Bark Characteristics
Twigs reveal hidden clues—hairy twigs often mean birch or willow, while smooth, green twigs point to ash or maple. Look for bud scales (protective coverings on buds): Opposite buds confirm dogwood, while alternate buds are typical of oak or cherry. Scratch the bark—peeling bark is a dead giveaway for birch or sycamore.
Don't overlook thorns—they're a signature of hawthorn or black locust. I always run my fingers along the twig to feel for ridges, bumps, or lenticels (porous spots). These textures become second nature after a few outings. If you're still unsure, snap a twig (don't break large branches!) and bring it home for closer inspection.
☀️ Step 4: Cross-Reference with Seasonal Clues
Timing matters—spring flowers, fall color, and winter buds all provide context. A tree with white spring blooms and red berries in fall is likely a serviceberry. If the fruit is dry and papery in autumn, it's probably an elm or ash. I keep a seasonal checklist: "Spring = flowers + buds; Summer = leaves + fruit; Fall = color + fruit; Winter = bark + buds."
Real talk: Some trees, like mulberry or persimmon, are easy, but others—beech or ironwood—require patience. Start with common species in your region, then expand. I always verify with a local field guide or iNaturalist app to double-check my guesses. The more you practice, the faster you'll spot patterns.
✂️ Step 5: Verify with a Field Guide or App
No matter how confident you feel, cross-reference with a trusted resource. Apps like LeafSnap or PictureThis let you upload photos for instant ID. For physical guides, Peterson Field Guides or Audubon Society guides are gold standards. I keep a waterproof field notebook in my pocket—jotting down fruit color, leaf shape, and twig texture helps me narrow it down before I even open the guide.
Here's the thing—some fruits, like wild grapes or blackberries, come from vines, not trees. If the plant lacks a single, woody trunk, it's probably a shrub or vine. Don't rush: Take your time, observe all clues, and compare notes with local experts. The more you practice, the more intuitive this becomes—soon, you'll identify trees by fruit without even thinking.
Tips & tricks for mastering tree identification by fruit
Here's what nobody tells you—these field-tested insights will sharpen your tree ID skills faster than any guidebook.
Start with the Fruit's Attachment: In Step 1, pay special attention to how the fruit connects to the tree. A cherry or hawthorn fruit grows solitary on a long stalk, while mulberry or elderberry fruits cluster like grapes. I've made the mistake of overlooking this detail—it's often the missing piece that confirms your guess. Snap a photo of this connection point before moving to leaves.
Leaf Arrangement is Non-Negotiable: When examining leaves in Step 2, remember this rule: Alternate leaves (like on oak or maple) grow one per node, while opposite leaves (like dogwood) appear in pairs. Compound leaves with multiple leaflets? That's your walnut or hickory red flag. I keep a small magnifying glass in my pocket—it reveals details like serrated edges or lobed patterns that distinguish hawthorn from oak.
Twig Texture Reveals More Than You Think: In Step 3, run your fingers along twigs to feel for hairy (birch/willow) or smooth (ash/maple) surfaces. Look for bud scales—opposite buds confirm dogwood, while alternate buds point to oak. I've identified more trees by twig feel than by any other single clue. Don't forget to scratch the bark: Peeling bark is birch's calling card.
Seasonal Context is Your Secret Weapon: Step 4's seasonal checklist is gold. In spring, note white flowers on serviceberry trees. In fall, dry papery fruit signals elm or ash. I maintain a yearly journal of seasonal patterns in my region—this helps me eliminate impossible species immediately. For example, if you see red berries in winter, it's not a persimmon (they ripen in fall).
Pro Tips for Identifying Trees By Fruit
- Here's what nobody tells you—these field-tested insights will sharpen your tree ID skills faster than any guidebook.
- Start with the Fruit's Attachment: In Step 1, pay special attention to how the fruit connects to the tree. A cherry o...
- Leaf Arrangement is Non-Negotiable: When examining leaves in Step 2, remember this rule: Alternate leaves (like on oa...
Frequently asked questions
Got questions about spotting trees by their fruit? You’re not alone! Here are some of the most common queries—and straightforward answers—to help you master this skill like a pro.
Can I identify a tree by fruit alone, or do I need other clues?
While fruit is a great starting point, combining it with leaf shape, bark texture, and twig arrangement gives you the most accurate ID. For example, a smooth red fruit might belong to a hawthorn or apple tree, but their leaves and thorns differ completely. Always cross-reference!
What’s the best time of year to look for fruit on trees?
Timing depends on the tree! Summer and early fall are peak seasons for most fruit-bearing trees (think apples, cherries, or persimmons), while late fall/winter may reveal dried or persistent fruits like hazelnuts or acorns. Evergreens (like juniper berries) stay visible year-round.
What if the fruit is already fallen or rotting?
No worries—use the fruit’s remnants or nearby clues. Look for:
- Seed pods or pits (e.g., cherry pits or walnut shells).
- Leaf litter beneath the tree (shape/size matches the fruit’s parent).
- Animal activity (squirrels near acorns, birds pecking at berries).
Are there trees that look identical but have different fruit?
Close relatives or lookalikes can trick you—like mulberries (black/purple) vs. elderberries (smaller, clustered) or dogwoods (red berries) vs. serviceberries (bluer, waxy). Pay attention to fruit arrangement (singular vs. clusters) and leaf veins.
What should I avoid when identifying trees by fruit?
Steer clear of these pitfalls:
- Assuming all berries are edible—many are toxic (e.g., pokeweed or bittersweet). When in doubt, check a poisonous plant guide.
- Ignoring location: Some fruits (like huckleberries) grow only in specific regions.
- Relying on color alone: Ripe fruit can change hues (e.g., persimmons turn from green to orange).
Wrapping up and next steps
Mastering the art of identifying trees by fruit is like unlocking a secret language of nature—one where every shape, color, and texture tells a story. Whether you're a curious hiker, a gardener, or just someone who loves exploring the outdoors, these clues will turn your walks into exciting adventures. 🌳✨
Now that you’re armed with the knowledge to spot and recognize trees by their fruit, why not take it a step further? Grab a notebook and start documenting the trees you encounter—note their fruits, leaves, and even the season they appear.
Over time, you’ll build your own personal field guide, and who knows? You might just become the go-to expert in your neighborhood!