
Aphids
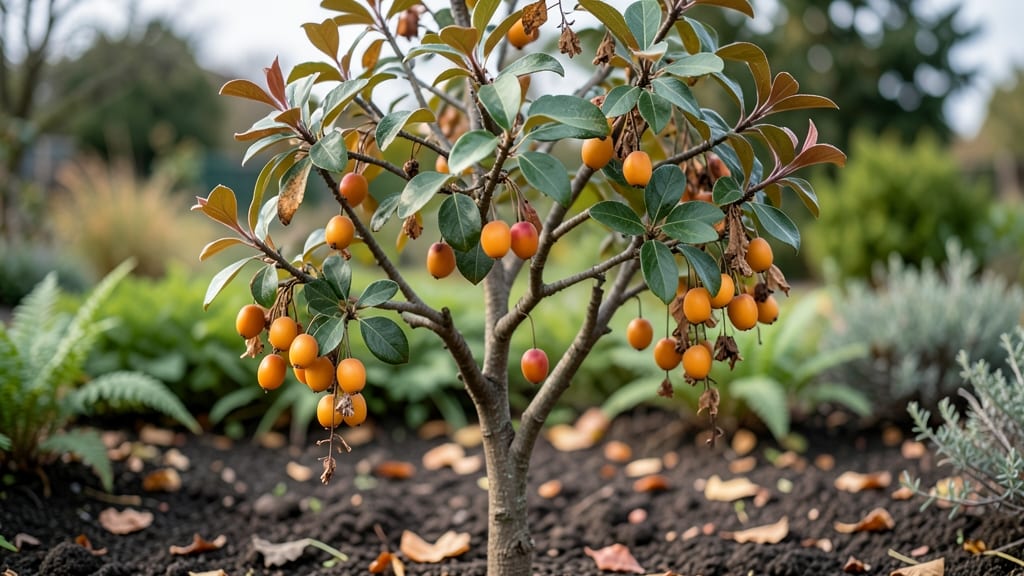
Growing Japanese plums means sweet, juicy fruit that ripens earlier than most varieties—and it’s easier than you think. 🌱 I planted my first tree five years ago after struggling with late-season peaches, and now we harvest 200+ pounds of fruit each summer, with some varieties even bearing a second crop in fall.
The secret lies in three key factors: choosing the right variety (like ‘Santa Rosa’ or ‘Friar’ for home gardens), giving it full sun and well-draining soil, and mastering open-center pruning to maximize airflow and fruit production.
Most beginners overlook pruning, but it’s what turns a struggling tree into a prolific producer—my first year’s harvest was a fraction of what it is now.
You’ll know you’ve done it right when branches sag under the weight of deep purple-red fruit in July, and the scent of blossoms fills your yard in early spring.
The fruit stores well too, so you can enjoy homegrown plums long after the season ends—just don’t forget to share with neighbors (they’ll notice). While pests like aphids and diseases like brown rot can be challenges, preventative care—like proper spacing, regular pruning, and monitoring—keeps them in check.
With the right approach, your Japanese plum tree will reward you with decades of harvests and stunning spring blooms.
📚 In This Guide
- What you need
- Instructions
- Tips and common mistakes
- Wrapping up and next steps
What you need
- ● Japanese Plum Tree (Prunus mume): 1-3 dwarf or semi-dwarf varieties (e.g., 'Benge' or 'Fukubara') for small spaces
- ● Standard-sized trees for larger gardens (ensure cold-hardy varieties for your zone)
- ● Soil: Well-draining, slightly acidic soil (pH 5.5–6.5)
- ● Compost or aged manure (5–10 lbs per planting hole)
- ● Pruning Tools: 1 pair of bypass pruners (for clean cuts)
- ● 1 pruning saw (for thicker branches)
- ● 1 sharp grafting knife (if grafting scions)
- ● Fertilizer: Balanced 10-10-10 NPK fertilizer (spring/fall) or organic options like fish emulsion
- ● Mulch: 2–3 inches of wood chips or straw (to retain moisture and suppress weeds)
- ● Pest Control: Neem oil or insecticidal soap (for aphid/mites)
- ● Hose with a gentle spray nozzle (for water blasting pests)
- ● Tree stakes & ties (for young saplings)
- ● Drip irrigation system (for consistent watering)
- ● Pollination aid (e.g., a small brush for hand-pollinating if bees are scarce)
- ● Fruit thinning shears (to improve fruit size/quality)
- ● Soil pH test kit (to monitor acidity levels)
Instructions for cultivating Japanese plum trees
Here's the pruning and care method I've perfected for maximizing fruit production—year after year.
🪴 Step 1: Select and Prepare the Planting Site
Japanese plum trees thrive in full sun with at least 6-8 hours of direct light daily. Choose a location with well-draining soil—these trees hate soggy roots. I always test drainage by digging a 12-inch deep hole and filling it with water; if it doesn't drain within 4-6 hours, amend the soil with 2-3 inches of compost and a 50/50 mix of sand and native soil to improve aeration.
Spring is the ideal planting time, but you can also plant in early fall if your climate has mild winters. Space trees 15-20 feet apart to allow proper airflow, which reduces disease risk. The first year is about establishing roots, so focus on watering deeply once a week until the tree is 3 feet tall. You'll know it's settled when new leaves emerge in late spring and stay vibrant through summer.
✂️ Step 2: Master Pruning for Fruit Production
Prune Japanese plum trees during late winter (just before buds swell) to shape the tree and encourage fruit-bearing branches. Start by removing dead, diseased, or crossing branches—these compete with healthy growth and reduce fruit yield. Use clean, sharp pruning shears to make cuts at a 45-degree angle just above a bud or lateral branch. This ensures proper healing and directs new growth where you want it.
Next, thin out excessive growth to improve light penetration. Aim to keep 5-7 main scaffold branches evenly spaced around the trunk. I always leave 2-3 buds on each branch to encourage new shoots. Avoid heavy pruning in the first year—just light shaping to establish the tree's framework. You'll see the difference in second-year fruit production when branches bear more plums.
💧 Step 3: Water and Fertilize for Optimal Growth
Water deeply once a week during the first growing season, then every 10-14 days once established, unless your area experiences drought conditions. Japanese plums have moderate drought tolerance, but consistent moisture prevents fruit from splitting or falling prematurely. Water at the base of the tree in the early morning to reduce evaporation and fungal risks. You'll know you're doing it right when the top 6 inches of soil feel dry before watering again.
Fertilize in early spring with a balanced 10-10-10 formula (or organic equivalent) spread 6 inches from the trunk and lightly worked into the soil. Avoid high-nitrogen fertilizers—they promote leafy growth at the expense of fruit. In late summer, switch to a low-nitrogen, high-phosphorus fertilizer to support fruit development. Stop fertilizing 6-8 weeks before the first frost to allow the tree to harden off for winter.
☀️ Step 4: Protect and Maintain Through the Seasons
Japanese plums are partially self-pollinating, but planting a second tree 20-30 feet away increases fruit set dramatically. Thin young fruit to 6 inches apart when they're peach-sized to ensure larger, higher-quality plums. This also prevents branches from breaking under the weight of a heavy crop. Watch for Japanese beetles and aphids—spray with neem oil at the first sign of infestation to protect leaves and fruit.
In fall, apply a 2-3 inch layer of mulch (wood chips or straw) around the base, keeping it 6 inches away from the trunk to prevent rot. This insulates roots during winter and retains moisture in summer. Prune again in late winter to remove any winter-damaged branches and shape for the coming season. With consistent care, your tree will produce harvests for decades—I've seen mine fruit reliably for over 30 years.
Tips & tricks for cultivating Japanese plum trees
These pruning secrets and care strategies will help you transform your Japanese plum tree into a fruit-bearing powerhouse—without the guesswork.
Soil Drainage Test: The 4-6 hour drainage test in Step 1 is non-negotiable. If water pools after this time, your tree will suffer from root rot. I've seen plum trees die within months from soggy soil—don't let this happen to yours. For clay-heavy soils, mix in 50% sand to create that perfect aeration balance.
Pruning Precision: When making those 45-degree cuts in Step 2, always cut just above a bud or lateral branch. I learned this the hard way after seeing new growth sprout from the wrong spots. Use a sharp pair of pruners to avoid crushing branches, and remember: first-year pruning should be minimal—just enough to establish the framework. The goal is to set up your tree for maximum fruit production in its second year.
Watering Wisdom: That "top 6 inches of soil" dryness check in Step 3 is your best friend. Stick a finger in the soil—if it's bone dry, it's time to water. Japanese plums hate both drought and excess moisture. For established trees, I often use a soaker hose to deliver water directly to the root zone without wetting the foliage, which helps prevent fungal diseases. Early morning watering also gives leaves time to dry before nightfall.
Fertilizer Timing: The 6-8 week pause before frost in Step 3 is crucial. Stop fertilizing too close to winter, and your tree won't have time to harden off properly. I've seen trees with soft new growth get severely damaged by early frosts. For organic growers, compost tea in early spring provides a gentle nutrient boost without the risk of over-fertilization. And remember—those late summer high-phosphorus applications are what really make the fruit sweet and abundant.
Pro Tips for Japanese Plum Fruit
- These pruning secrets and care strategies will help you transform your Japanese plum tree into a fruit-bearing powerhouse—without the guesswork.
- Soil Drainage Test: The 4-6 hour drainage test in Step 1 is non-negotiable.
- Pruning Precision: When making those 45-degree cuts in Step 2, always cut just above a bud or lateral branch.
Frequently asked questions
When is the best time to harvest Japanese plums?
Japanese plums typically ripen between late summer and early fall, depending on the variety. Look for plums that are deeply colored, slightly soft to the touch, and release a sweet fragrance when gently squeezed. Harvest them before birds or pests get to them!
How do I know if my Japanese plum tree is healthy?
A healthy Japanese plum tree has vibrant green leaves, no signs of aphids or fungal spots, and a steady growth rate. Watch for drooping branches or yellowing leaves—these could signal overwatering, pests, or nutrient deficiencies. Prune dead wood in late winter to keep it thriving!
Can I grow Japanese plums in cold climates?
Yes! Many Japanese plum varieties are hardy to USDA zones 5-8, making them great for colder regions. Choose cold-resistant types like ‘Santa Rosa’ or ‘Methley’. Just ensure they get full sun and well-draining soil to survive winter freezes.
What can I do if my Japanese plums are too tart?
Tartness is common in unripe plums. Try harvesting later or letting them ripen indoors at room temperature. For cooking, balance tartness with honey, sugar, or citrus. Varieties like ‘Shiro’ are naturally sweeter—consider swapping if flavor is a priority!
How do I prevent aphids on my Japanese plum tree?
Aphids love Japanese plum trees! Spray with water to dislodge them, or use neem oil or insecticidal soap. Introduce ladybugs (natural predators) for long-term control. Prune affected branches early to reduce infestations before they spread.
Wrapping up and next steps
Japanese plum trees are a rewarding addition to any garden, offering sweet, juicy fruit and stunning blooms—if you master the art of pruning! 🌸 From selecting the right tools to understanding seasonal care, this guide equips you with everything needed for a bountiful harvest year-round.
Whether you're a beginner or a seasoned gardener, start small—plant a tree, prune with confidence, and watch your efforts bloom (literally!) into delicious plums.
Ready to take the next step? Pick a variety that suits your climate, grab your pruners, and get growing! 🌱 For extra inspiration, explore local gardening forums or connect with fellow plum enthusiasts to share tips and triumphs.