
Pruning
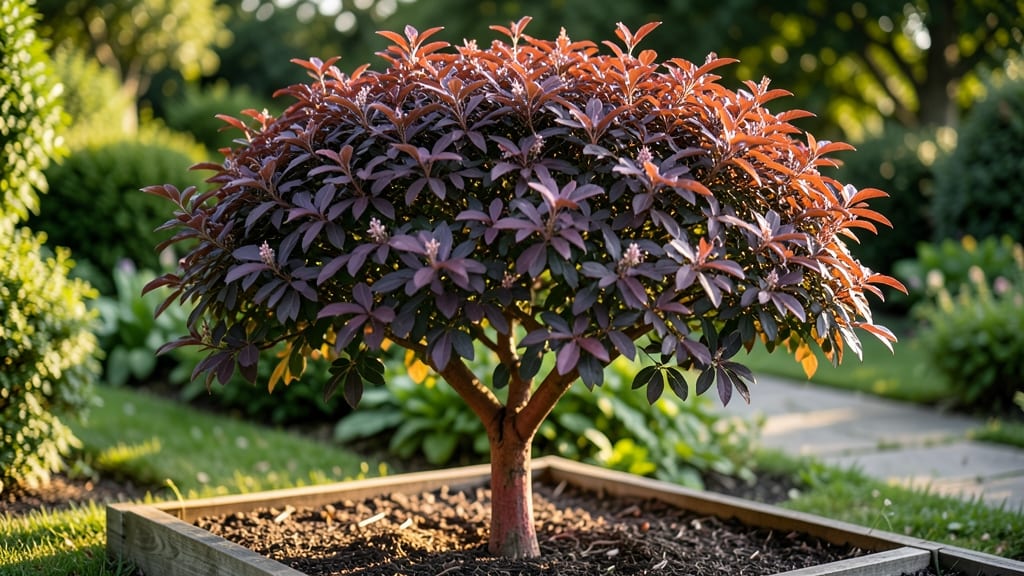
Planting a non-fruit-bearing plum tree isn’t just about pruning—it’s about sculpting a living work of art. 🌿 These trees offer stunning spring blooms, striking foliage, and beautiful bark year-round, but they need the right care to shine.
I’ve pruned mine for five seasons, and the difference between a wild tangle and a showstopper garden feature comes down to timing, technique, and a little seasonal TLC.
The key to keeping your plum tree looking its best starts with understanding its growth habits. Unlike fruit-bearing varieties, these focus all their energy on branches, leaves, and flowers—not fruit—so you’ll prune for shape, airflow, and sunlight exposure.
A sharp pair of pruners, a clean saw for thicker branches, and a disinfectant spray are your essential tools. The real magic happens in late winter or early spring, just before buds swell, when the tree is dormant but ready to respond.
What you’ll end up with is a tree that bursts into bloom every spring, with glossy foliage that turns golden in fall and striking bark texture in winter. The best part?
You’ll spend less time battling tangled branches and more time admiring your garden’s new centerpiece. Pruning isn’t just maintenance—it’s how you unlock a plum tree’s full ornamental potential.
Works for any landscape, from formal gardens to cottage-style yards. Whether you’re shaping a small patio tree or a tall ornamental specimen, these techniques adapt easily. Let’s get those branches looking intentional!
📚 In This Guide
- What you need
- Instructions
- Tips and common mistakes
- Wrapping up and next steps
What you need
- ● Pruning shears (bypass or anvil type): Sharp, clean, and disinfected (70% isopropyl alcohol or bleach solution). Size: 6–8 inches for small branches.
- ● Loppers: For thicker branches (½–1½ inches in diameter). Quantity: 1 pair.
- ● Pruning saw: For branches over 1½ inches thick. Type: Curved-tooth saw for clean cuts.
- ● Gloves: Heavy-duty, cut-resistant gloves (e.g., leather or synthetic blend) for safety.
- ● Disinfectant: 1 part bleach to 9 parts water (or commercial tree wound sealant) to prevent disease spread.
- ○ Pruning sealant (optional): For large cuts (over ½ inch) to protect against pests/disease.
- ● Ladder or step stool: Height: Reaches the tree’s highest branches safely. Tip: Use a stable, non-slip model!
- ● Heavy-duty trash bags: For collecting debris. Quantity: 2–3 bags.
- ● Notebook & pencil: To sketch a pruning map or note cuts made.
- ● Weather check: Prune on a dry, calm day (avoid rain or high winds). Best time: Late winter/early spring (dormant season).
- ● Safety glasses: Protect your eyes from debris.
- ● Long sleeves & pants: Wear layers to avoid scratches from branches.
- ● First-aid kit: Bandages, antiseptic wipes, and tweezers (for splinters).
- ● Tree health assessment: Inspect for diseased or dead branches before starting. Remove these first!
- ● 🔥 Sharpen your tools: Dull blades tear bark—always sharpen shears/loppers before pruning.
- ● 🌡️ Work with the grain: Cut at a 45-degree angle just outside the branch collar (the swollen area where the branch meets the trunk).
- ● ✨ Mark your cuts: Use chalk or tape to outline branches to remove before climbing the ladder.
Step-by-step pruning guide for non-fruit-bearing plum trees
Here's how to shape your ornamental plum tree into a stunning year-round landscape feature.
✂️ Step 1: Prune in Late Winter Before Bud Break
Timing is everything—wait until late winter when the tree is still dormant but just before first buds swell (usually February-March in most climates). This ensures you remove dead wood while preserving next season's growth. I grab my sharp bypass pruners and start by removing any dead, diseased, or crossing branches first—they're the easiest to spot.
Look for branches that are grayish-brown, brittle, or devoid of leaves—these are dead. Diseased branches often have blackened cankers or oozing sap. Cut these back to healthy wood, making your cuts at a 45-degree angle just above an outward-facing bud. This prevents water from pooling and rotting the wound.
🌿 Step 2: Thin the Canopy for Better Airflow
Next, focus on thinning the interior canopy to let sunlight and air reach the center of the tree. Aim to remove 20-30% of the total foliage by selecting branches that are too close together, growing inward, or rubbing against others. You'll see where branches compete for space—they'll have smaller leaves or sparse foliage compared to healthier branches.
Make your cuts at the branch collar (the swollen area where the branch meets the trunk) to avoid leaving stubs. This promotes faster healing. If a branch is larger than 2 inches in diameter, use your pruning saw instead of pruners to avoid tearing the bark. Step back occasionally to visualize the tree's shape—you want an open, vase-like structure that lets light filter through.
☀️ Step 3: Shape for Year-Round Interest
Now it's time to refine the tree's form. Non-fruit-bearing plum trees often have showy bark, colorful foliage, or winter interest, so prune to highlight these features. If your tree has peeling bark, avoid cutting into the trunk—focus on shaping the branches instead. For foliage color, remove branches that grow too upright or downward, as these can block light from the more vibrant inner growth.
Use hand pruners for branches up to ½ inch thick and your pruning saw for anything larger. Cut just outside the branch collar to encourage smooth healing. If your tree has thorns, wear gloves—those suckers are sharp! Step back every few cuts to check your progress. The goal is a balanced, open silhouette that looks good from all angles, not just the front.
⏰ Step 4: Light Summer Pruning for Cleanup
After the main winter pruning, do a light cleanup in early summer (around June) to remove any water sprouts, suckers, or dead growth that appears. Water sprouts are those fast-growing, vertical shoots that pop up along the trunk or branches—they steal energy from the rest of the tree. Snip them off at the base with your hand pruners.
This is also the time to trim any branches that grew too long during spring. Make your cuts just above a leaf bud or side branch to maintain the tree's shape. Avoid heavy pruning in summer—it stresses the tree and can lead to suckering or weak growth. Keep your tools clean and sharp to prevent spreading disease between cuts.
🌱 Step 5: Autumn Maintenance for Winter Readiness
In late autumn (around November), do a final walkthrough to remove any damaged or diseased branches that might have appeared over the summer. This is also the time to prune any branches that grew into power lines, sidewalks, or structures—safety first! Use your pruning saw for larger branches and make clean cuts at the branch collar.
After pruning, water the tree deeply to help it recover. Apply a 2-3 inch layer of mulch around the base (but keep it 6 inches away from the trunk) to protect roots from freezing temperatures. This is the last major pruning of the year—let the tree rest and prepare for winter. You'll see the results in spring, with a stronger, more beautiful tree ready to shine.
Tips & tricks for perfectly pruned non-fruit-bearing plum trees
Here's what I've learned after years of shaping these stunning landscape trees—details that make all the difference between a messy pruning job and a showstopping specimen.
Timing is Everything: That February-March window in Step 1 is non-negotiable for non-fruit-bearing plums. The tree must be fully dormant but before buds swell—this prevents stressing the tree when it's about to burst into growth. I check for bud swelling by gently pressing a fingernail into the buds; if they're still firm, it's safe to prune. The goal is to remove dead wood while preserving next year's potential.
Branch Collar Matters: In Steps 2 and 3, cutting at the branch collar (that swollen area where branches meet the trunk) is absolutely critical. I've seen too many pruners leave stubs that collect water and rot. Make your cuts just outside the collar—this encourages faster healing and prevents disease. For branches larger than 2 inches, use your pruning saw and make the cut at a 45-degree angle to shed water effectively.
Visualize the Vase Shape: Step 2's 20-30% thinning target might sound vague, but here's the trick: step back every 5-10 cuts and visualize a vase shape. The center should be open enough to let sunlight reach the trunk, while outer branches create that elegant silhouette. I often sketch a simple outline on paper first—it helps me see where branches need to go before I make any cuts.
Safety First with Thorns: If your plum tree has thorns (common in ornamental varieties), wear heavy-duty gardening gloves—those suckers are sharp! I've had to learn this the hard way after trying to prune without protection. For stubborn branches, use your pruning saw and work slowly to avoid accidental cuts. And always prune away from yourself to prevent injury when branches snap back.
Pro Tips for Non Fruit Bearing Plum Tree
- Here's what I've learned after years of shaping these stunning landscape trees—details that make all the difference b...
- Timing is Everything: That February-March window in Step 1 is non-negotiable for non-fruit-bearing plums. The tree mu...
- Branch Collar Matters: In Steps 2 and 3, cutting at the branch collar (that swollen area where branches meet the trun...
Frequently asked questions
Got questions about non-fruit-bearing plum trees? You’re not alone! Whether you’re just starting or troubleshooting, here are some common concerns—and their solutions—to keep your tree thriving year-round.
Why isn’t my plum tree producing fruit?
Non-fruit-bearing plum trees may lack fruit due to lack of pollination, improper pruning, or young age. Some varieties (like ornamental plums) are bred for foliage, flowers, or structure—not fruit. Check if your tree is a flowering plum or dwarf variety, which prioritize aesthetics over harvests.
How long does it take for a non-fruit-bearing plum tree to mature?
Most plum trees take 3–5 years to mature enough for fruit production—but non-fruit-bearing types may never bear fruit. Focus on pruning for shape and health instead. If you want fruit later, consider grafting a fruiting variety onto your existing tree (consult a local nursery for compatibility).
When is the best time to prune a non-fruit-bearing plum tree?
Prune late winter or early spring (before buds swell) to encourage new growth. Avoid heavy pruning in fall, as it can stimulate late-season growth vulnerable to frost. For ornamental plums, light shaping prunes in summer (after flowering) also work well to maintain form.
Can I turn a non-fruit-bearing plum tree into a fruit-bearing one?
Yes! If your tree is healthy, you can graft a fruiting plum variety onto it. Choose a compatible rootstock (like Myrobalan or St. Julien A) and a graft-ready scion. Success depends on timing (late winter/early spring) and skill—consider hiring a professional if you’re new to grafting.
What should I do if my plum tree’s leaves turn yellow or drop?
Yellowing leaves often signal nutrient deficiency (iron/chlorosis), pests (aphids, spider mites), or disease (bacterial spot). Start with a soil test and adjust pH if needed (plums prefer 6.0–6.5). Treat pests with neem oil, and prune infected branches 1 inch below discolored areas to prevent spread.
Are non-fruit-bearing plum trees still good for my landscape?
These trees offer stunning spring blooms, lush foliage, and year-round interest with their bark and winter shape. They’re also low-maintenance compared to fruiting varieties. Plant them near patios or as focal points for color and texture without the mess of fallen fruit.
Wrapping up and next steps
Growing a non-fruit-bearing plum tree is all about nurturing its beauty and structure—whether for shade, aesthetics, or even future grafting potential! 🌿 With the right pruning techniques, you’ll keep it healthy, vibrant, and thriving year-round. Remember, consistency is key, and a little effort now means lush, long-lasting growth later.
Ready to take the next step? Grab your pruners and schedule your first trim session! Start small, observe your tree’s response, and adjust as needed. Happy pruning—your tree will thank you with stunning new growth! 🌱