
Blooming
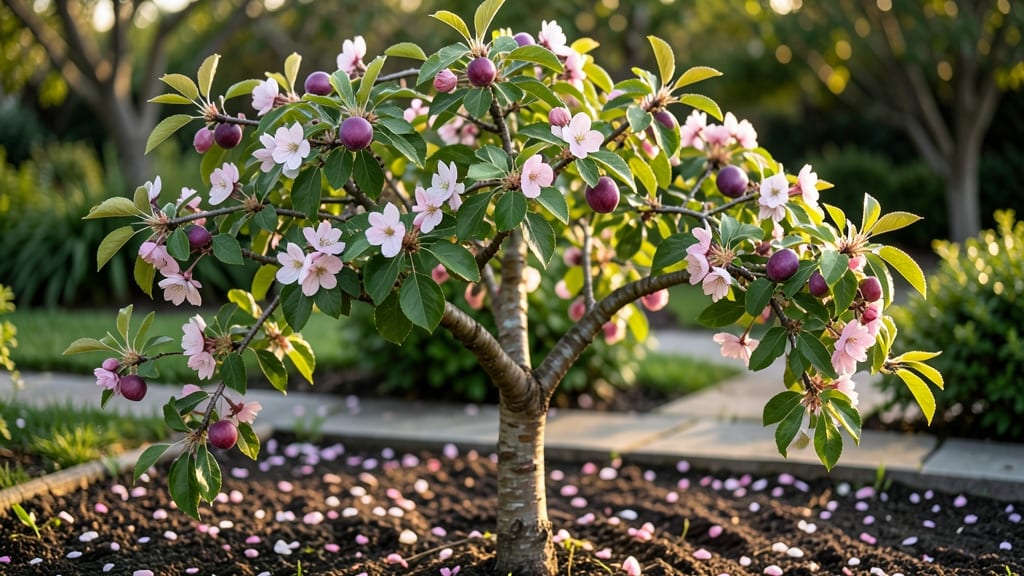
Growing plum trees means waking up to pink clouds of blossoms in spring and feasting on sweet fruit by summer—all from the same tree. 🌸 I've learned the hard way that the secret to consistent harvests lies in strategic pruning, which keeps the tree healthy and productive year after year.
Most gardeners focus only on the fruit, but those delicate blossoms are just as important—they're your tree's promise of next season's harvest.
The right variety makes all the difference: choose Japanese plums for early blooms and sweet fruit, or European plums if you prefer tartness and better storage. Plant in full sun with well-draining soil, and watch those blossoms transform into fruit within 2-3 years.
The key is patience—plum trees need time to establish strong roots before they reward you with heavy harvests.
By pruning at the right time—late winter or early spring—you'll encourage stronger growth and better fruit set. A well-pruned tree produces larger, juicier plums and fewer problems with fruit drop.
The blossoms themselves are a showstopper, attracting pollinators and adding beauty to your landscape long before the fruit appears.
Even in colder climates, you can grow plums with the right care—just pick cold-hardy varieties like Stanley or Methley. The trade-off? Slightly smaller fruit, but the reward is years of reliable harvests with minimal fuss. Ready to turn your yard into a plum paradise?
📚 In This Guide
- What you need
- Instructions
- Tips and common mistakes
- Wrapping up and next steps
What you need
- ● Plum Blossom Fruit Trees: 1–3 Prunus mume (plum blossom) saplings or grafted trees (choose dwarf varieties for containers or standard for ground planting).
- ○ Optional: Pre-grafted trees with disease-resistant rootstock for faster fruiting.
- ● Soil: Well-draining, slightly acidic soil (pH 5.5–6.5). Mix in compost or aged manure for fertility.
- ● For containers: 50% potting mix + 50% perlite/sand blend (10–20 gallons per tree).
- ● Fertilizer: Balanced 10-10-10 or organic fertilizer (e.g., fish emulsion) for planting.
- ● Slow-release citrus/fruit tree fertilizer (e.g., Osmocote) for ongoing care.
- ● Hand trowel or transplanting spade
- ● Pruning shears (sterilized with rubbing alcohol)
- ● Grafting tools (if propagating from cuttings)
- ● Mulch (straw or wood chips, 2–3 inches deep)
- ○ Optional: Drip irrigation kit or soaker hoses for consistent moisture.
- ● Full sun exposure (6+ hours daily).
- ● Cold-hardy climate (USDA Zones 6–9; protect young trees in colder zones with frost cloth).
- ● Patience! Plum blossom trees take 3–5 years to bear fruit.
Step-by-Step instructions for cultivating plum trees with year-round fruit
Here’s how I’ve learned to coax plums into bearing fruit reliably—even in less-than-ideal climates.
🌱 Step 1: Select and Plant the Right Variety for Your Climate
Choose a cold-hardy plum variety like ‘Stanley’ or ‘Methley’ if you’re in zones 5-7, or heat-tolerant ‘Santa Rosa’ for warmer regions. These varieties bloom early and produce fruit even in partial shade. Plant your tree in full sun to partial shade—at least 6-8 hours of light daily—and avoid low-lying spots where cold air settles.
Dig a hole twice as wide as the root ball but only as deep. Loosen the roots slightly if they’re circling, then place the tree so the graft union sits 2-3 inches above soil level. This prevents rot and ensures strong regrowth. Backfill with native soil mixed with compost—never use garden soil alone, as it compacts and suffocates roots.
☀️ Step 2: Prune Strategically for Year-Round Fruit Production
Prune in late winter or early spring before buds break, removing dead, crossing, or inward-growing branches. Open the center of the tree to let light and air circulate—this reduces disease and encourages fruit set. Cut back last year’s growth by 1/3 to stimulate new, productive branches.
In summer, thin out excessive fruit clusters to 4-6 plums per spur (the small, fruiting branch). This ensures larger, higher-quality fruit and prevents branch breakage. Watch for sucker growth—those vigorous shoots at the base steal energy from fruit production, so remove them promptly.
💧 Step 3: Water Deeply and Fertilize for Consistent Harvests
Water deeply once a week during dry spells, soaking the soil 12-18 inches down. Shallow watering encourages weak roots and poor fruit set. You’ll know you’ve watered enough when soil 1 inch below the surface feels moist but not soggy. Mulch with 2-3 inches of organic matter (like wood chips) to retain moisture and regulate soil temperature.
Fertilize in early spring with a balanced 10-10-10 formula, then again after harvest. Avoid high-nitrogen fertilizers—they promote leafy growth at the expense of fruit. Instead, use compost or organic fruit-tree fertilizer for steady, nutrient-rich growth. Yellowing leaves? That’s a sign of over-fertilization or poor drainage.
✂️ Step 4: Thin Fruit and Protect Against Pests/Disease
When plums are golf-ball sized, thin them to 6 inches apart on the branch. This prevents overcrowding, improves air flow, and ensures larger fruit. Remove any mummified or split plums—they harbor disease and attract pests. Prune out diseased branches immediately to stop the spread of brown rot or fungal infections.
Monitor for plum curculio and Japanese beetles—handpick adults and drop them in soapy water. For severe infestations, use neem oil spray in early summer. A reflective mulch (like aluminum foil) around the base can deter pests by confusing their navigation.
⏰ Step 5: Harvest and Prepare for Next Year’s Fruit
Pick plums when they easily separate from the tree and have deep color (varies by variety). Harvest in morning hours when temperatures are coolest to preserve flavor and texture. Store in the fridge for up to 2 weeks or process into jams, jellies, or dried fruit.
After harvest, apply a dormant oil spray in late fall to smother overwintering pests. Rake up and destroy any fallen fruit to prevent disease spores from surviving. Mark your calendar for next year’s pruning—consistent care is what turns a good harvest into a year-round bounty.
Tips & tricks for perfect plum blossom fruit cultivation
These insights will help you maximize your plum tree's potential and troubleshoot common growing challenges before they become problems.
Variety Selection Matters: When choosing your plum variety, consider not just your climate zone but also your intended use. 'Santa Rosa' produces sweet, juicy plums perfect for fresh eating, while 'Stanley' is better suited for cooking and preserves. For urban gardens with limited space, dwarf varieties like 'Methley' can be pruned into espalier form against fences or walls, saving space while still producing abundant fruit. The right variety planted in the right location is the foundation of your year-round harvest.
Pruning Precision: In Step 2, when you're pruning to cut back last year's growth by 1/3, make your cuts just above outward-facing buds at a 45-degree angle. This encourages new growth that will bear fruit while maintaining the tree's natural shape. For summer thinning, use clean, sharp pruners to remove excess fruit clusters—don't just pull them off by hand, as this can damage the delicate spurs where next year's fruit will form. Remember that every cut you make should have a purpose: either opening up the center for better air circulation or removing dead or diseased wood.
Watering Wisdom: The deep watering technique mentioned in Step 3 is crucial, but there's more to it than just the frequency. Use a soil probe or long screwdriver to check moisture levels after watering—you should be able to push it down 12-18 inches with minimal resistance. For newly planted trees, consider installing a drip irrigation system on a timer to ensure consistent moisture without overwatering. The key is to keep the root zone consistently moist but never soggy, as plum trees are particularly susceptible to root rot in waterlogged conditions.
Pest Prevention: While neem oil spray is excellent for treating existing pest problems, prevention is even better. Install pheromone traps for plum curculio in early spring before the adults emerge, and wrap tree trunks with sticky bands to catch crawling insects. For Japanese beetles, handpicking remains the most effective method—these pests are attracted to the tree's scent, so check for them daily during peak season (late morning when they're sluggish). A reflective mulch isn't just for aesthetics; it creates visual confusion that can deter pests from finding your tree in the first place.
Pro Tips for Plum Blossom Fruit
- These insights will help you maximize your plum tree's potential and troubleshoot common growing challenges before th...
- Variety Selection Matters: When choosing your plum variety, consider not just your climate zone but also your intende...
- Pruning Precision: In Step 2, when you're pruning to cut back last year's growth by 1/3, make your cuts just above ou...
Frequently asked questions
Got questions about growing plum blossom fruit?
You’re not alone! Here are some of the most common inquiries—plus quick, actionable answers to keep your trees thriving year-round.
When is the best time to plant plum blossom fruit trees?
Plant in early spring (just as buds swell) or late fall (6–8 weeks before frost). Avoid summer planting—heat stress slows root establishment. For container-grown trees, plant anytime roots aren’t pot-bound. Pro tip: Amend soil with compost to boost early growth!
How long does it take for plum blossom fruit to bear fruit?
Most varieties produce first fruit in 3–5 years, but dwarf trees may fruit sooner (1–2 years). Patience pays off—young trees focus on root/leaf growth first. Boost production: Prune strategically in winter to encourage flowering branches.
Can I grow plum blossom fruit in containers? Yes—but how?
Use a 5-gallon+ pot with drainage holes and well-draining soil (60% potting mix, 30% perlite, 10% compost). Dwarf varieties (like ‘Santa Rosa’) thrive in containers. Key moves: Fertilize monthly in growing season, repot every 2–3 years, and move indoors if temps drop below 20°F.
Why aren’t my plum blossom fruit trees flowering?
Common culprits:
- Too much nitrogen (focuses on leaves, not flowers). Switch to a balanced 10-10-10 fertilizer.
- Insufficient sunlight (6+ hours daily). Move trees to sunnier spots.
- Young age (most trees need 2–3 years to flower). Be patient!
Are plum blossom fruits safe to eat raw? What’s the best way to prepare them?
Yes! They’re edible raw but sweeter when fully ripe (deep color, soft to touch). For cooking, try:
- Jam/jelly: Simmer with sugar and lemon juice.
- Wine: Ferment with grapes for a floral twist.
- Salads: Slice thinly for a tangy crunch.
Wrapping up and next steps
Growing plum blossom fruit is a rewarding journey that blends patience, care, and a touch of horticultural magic! 🌸 With the right pruning techniques, soil prep, and seasonal strategies, you can enjoy a year-round harvest of vibrant blooms and delicious fruit.
Remember, consistency is key—whether it’s winter pruning or summer watering—your tree will thank you with bountiful rewards.
Ready to take the next step? Start small—plant a sapling, study your local climate, and experiment with pruning schedules. Before you know it, your garden will be alive with plum blossom magic! 🌱✨