
Fertilization
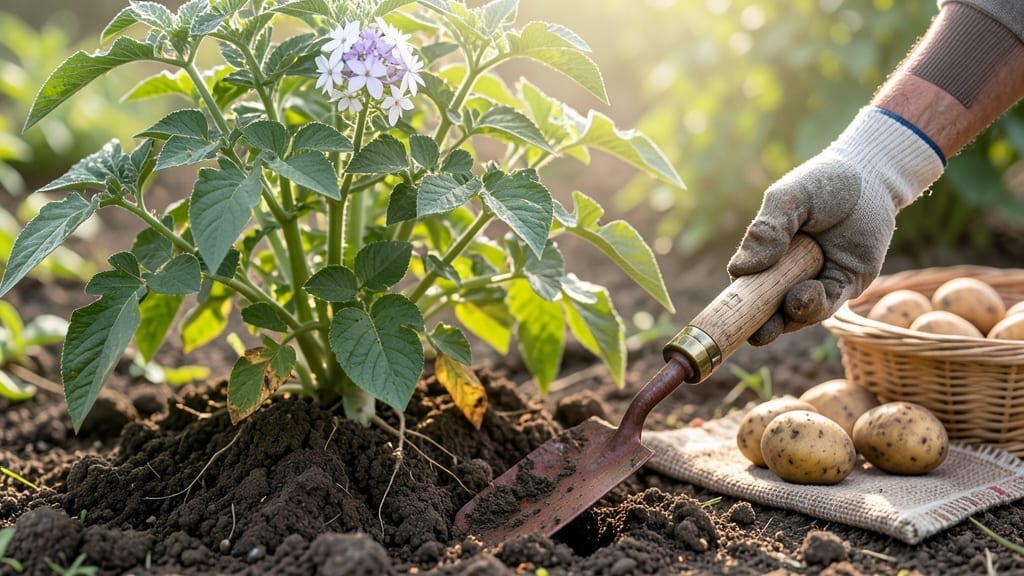
Potatoes aren't fruit—they're edible tubers, but they're still one of the most satisfying crops to grow. 🌱 I've grown them for years, and there's nothing like pulling up a harvest of crisp, homegrown spuds from your own soil.
The secret to success starts with the right variety and planting method, whether you're using seed potatoes or starting from scratch.
You'll need a sunny spot with well-draining soil rich in organic matter. Most gardeners plant in early spring, about 2-3 weeks before the last frost, but timing varies by climate. Water consistently—about 1 inch per week—and watch for those telltale flower spikes, which mean harvest time is near.
Sweet potatoes, on the other hand, take longer and prefer warmer soil.
Harvest when the foliage yellows and dies back, then let the tubers cure in a dark, dry place for a week. Properly stored potatoes can last 4-6 months, making them a pantry staple.
The first bite of a homegrown potato is always sweeter than anything you'll find in the store.
Whether you're growing for mashed potatoes, roasted spuds, or even potato chips, this guide covers everything from planting to storage. Let's get those spuds in the ground!
📚 In This Guide
- What you need
- Instructions
- Tips and common mistakes
- Wrapping up and next steps
What you need
- ● Seed potatoes (certified disease-free): 5–10 lbs (adjust based on garden size; ~3–4 potatoes per pound for planting). Choose varieties like Yukon Gold or Red Pontiac for reliable edibility.
- ● Garden plot or containers: For in-ground: A 4’ x 8’ plot, 6–8 inches deep, with loose, well-draining soil.
- ● For containers: 5–10 gallon pots (1 potato per 5 gallons) with drainage holes.
- ● Compost or aged manure: 2–3 gallons per 10 sq ft of plot (rich in nitrogen and organic matter).
- ● Balanced fertilizer (10-10-10 or 5-10-10): 1–2 lbs per 100 sq ft (apply at planting and mid-season).
- ● Mulch (straw or grass clippings): 2–3 inches to retain moisture and suppress weeds.
- ● Garden fork or tiller: For loosening soil to a depth of 12 inches.
- ● Hand trowel or transplanting spade: For planting seed potatoes and hilling soil.
- ● Gloves (gardening or work gloves): To protect hands from soil and sharp rocks.
- ● Watering can or hose with adjustable nozzle: For gentle, deep watering (1–1.5 inches per week).
- ○ Pruners or sharp scissors: Optional, for trimming foliage if needed.
- ● Harvesting basket or burlap sacks: To gently collect potatoes and avoid bruising.
- ● Sunlight: A location with full sun (6–8 hours daily)—potatoes thrive in warmth!
- ● Soil pH: Test your soil (ideal pH: 5.0–6.5). Adjust with lime or sulfur if needed.
- ● Patience: Potatoes need 90–120 days to mature—plan ahead!
- ● Local climate knowledge: Avoid planting in areas with late frosts (wait until soil is 45°F+).
- ● Potato clipper: For cutting seed potatoes into smaller pieces (if sprouting them indoors).
- ● Soil moisture meter: To monitor water levels and prevent over/under-watering.
- ● Row covers or frost cloth: For early-season protection from pests or cold snaps.
- ● Food-safe storage bins: With ventilation holes for post-harvest curing.
Step-by-step instructions for growing edible potato fruit safely
Here's how to grow and harvest potato tubers that are safe, healthy, and delicious.
🌱 Step 1: Select Certified Seed Potatoes
Never use grocery store potatoes—they're treated to prevent sprouting and may carry diseases. Instead, buy certified disease-free seed potatoes from a reputable supplier. Look for varieties labeled "organic" or "seed potatoes" to ensure they're safe for eating. Choose tubers with 2-3 eyes (dormant buds) for balanced growth.
Cut larger seed potatoes into 2-3 ounce pieces, ensuring each has at least 1-2 eyes. Let the cut pieces dry for 24 hours before planting. This prevents rot and gives the cut surfaces time to callus over. I like to place them on a paper towel in a dry, shaded spot until the edges feel slightly tough.
🪴 Step 2: Prepare Soil and Plant at Proper Depth
Potatoes thrive in loose, well-draining soil with a pH between 5.0-6.5. Work in 2-3 inches of compost or aged manure to provide nutrients without compacting the soil. If your garden has heavy clay, mix in 1-2 inches of perlite or coarse sand to improve drainage.
Plant seed potatoes 4-6 inches deep and 12 inches apart in rows spaced 30 inches apart. The deeper planting encourages tuber formation while protecting them from light, which turns potatoes green and toxic. Water the soil thoroughly after planting to settle it around the seed pieces.
☀️ Step 3: Maintain Moisture and Hill Soil as Plants Grow
Keep the soil consistently moist but never soggy—potatoes need 1-1.5 inches of water weekly. Use a rain gauge or your finger to check moisture; the top 2 inches of soil should feel damp. Mulch with 2-3 inches of straw or grass clippings to retain moisture and suppress weeds.
When plants reach 6 inches tall, mound soil around the stems (hilling) to encourage more tuber formation. Repeat this every 2-3 weeks until the plants flower. The hill should be 8-12 inches high by harvest time. This protects tubers from sunlight and prevents greening.
⏰ Step 4: Harvest at Peak Maturity and Cure Tubers
For new potatoes, gently dig around the plant when flowers appear and tubers are 1-2 inches in diameter. For full-sized potatoes, wait until the plant's foliage yellows and dies back completely. Use a fork to loosen the soil and avoid damaging the tubers. Handle them carefully—they bruise easily.
Spread harvested potatoes in a cool, dry, shaded area for 1-2 weeks to cure. This toughens the skin and improves storage life. Avoid washing them until you're ready to use or store. Store cured potatoes in a dark, humid place at 40-50°F—a basement or root cellar works best. Check periodically for soft spots or sprouting.
✂️ Step 5: Test for Edibility and Store Properly
Before eating, cut open a few tubers to check for green spots or sprouts, which indicate toxic solanine buildup. Discard any green tubers or those with deep eyes. Healthy potatoes should have firm, white flesh and no signs of rot. Store the rest in a paper bag or mesh sack to allow airflow and prevent moisture buildup.
Use stored potatoes within 2-3 months for best flavor and texture. If they start sprouting, move them to a brighter location or use them first. Never refrigerate potatoes—cold temperatures convert their starches to sugar, making them taste sweet and mealy.
Tips & tricks for growing safe, edible potato tubers
Here's what nobody tells you about growing potatoes that are both safe and delicious.
Selection Tip: When choosing your certified seed potatoes, look for varieties that suit your climate. Fingerling potatoes thrive in cooler regions, while russets do better in warmer areas. I've found that red potatoes strike the perfect balance for most home gardens—they're disease-resistant and produce consistently. Avoid varieties with thin skins, as they're more prone to bruising and greening during growth.
Planting Depth Matters: The 4-6 inch planting depth isn't arbitrary—it creates the ideal environment for tuber formation. Plant too shallow, and you'll get small potatoes exposed to sunlight (which creates toxic solanine). Too deep, and you'll struggle to harvest without damaging the tubers. I like to use a garden trowel to create pockets exactly 5 inches deep, then place the seed potato with eyes facing up. This consistency pays off at harvest time.
Hilling Technique: Don't skip the hilling step! When your plants reach 6 inches tall, mound soil around the stems to create an 8-12 inch hill by harvest time. This isn't just about covering the tubers—it's about creating a gradual slope that prevents soil compaction. I use a shovel to gently pull soil toward the plants rather than dumping it, which helps maintain good drainage around the developing tubers.
Harvest Timing: The 1-2 inch size for new potatoes is your visual cue—they'll be ready when flowers appear and tubers are golf-ball sized. For full-sized potatoes, wait until the foliage yellows completely (this is called "senescence"). I've learned the hard way that harvesting too early gives small potatoes, while waiting too long risks splitting tubers. The sweet spot is when about 75% of the foliage has turned yellow.
Pro Tips for Potato Fruit Edible
- Here's what nobody tells you about growing potatoes that are both safe and delicious.
- Selection Tip: When choosing your certified seed potatoes, look for varieties that suit your climate. Fingerling pota...
- Planting Depth Matters: The 4-6 inch planting depth isn't arbitrary—it creates the ideal environment for tuber format...
Frequently asked questions
Got questions about growing, harvesting, or enjoying potato fruit? You’re not alone! Here are answers to the most common queries to help you navigate this unique (and delicious) crop with confidence.
Can you eat potato fruit raw?
The fruit of the potato plant (the small, berry-like growths) is technically edible but not recommended raw. They contain solanine, a toxin also found in green potatoes, which can cause stomach upset. Always cook them thoroughly—think sautéed, roasted, or blended into sauces—to neutralize risks. Never eat raw!
How long does it take for potato fruit to ripen?
Potato fruit typically ripens 60–90 days after flowering, depending on the variety and growing conditions. Look for deep red, orange, or yellow berries that feel firm but slightly soft to the touch. Pro tip: Harvest when temps drop below 75°F (24°C) to avoid overripening, which can make them mealy or bitter.
What’s the best way to cook potato fruit?
Potato fruit shines in savory dishes! Try these methods:
- Roasting: Toss halved berries with olive oil, salt, and paprika; roast at 400°F (200°C) for 15–20 mins.
- Sautéing: Cook in butter with garlic and herbs for a jammy, tomato-like texture.
- Sauces: Blend into a rich, umami-packed sauce for pasta or pizza.
Why isn’t my potato plant producing fruit?
Missing fruit? Check these common culprits:
Issue
Fix
Lack of pollinators
Hand-pollinate with a soft brush or attract bees with companion plants like basil.
Poor lighting
Move to full sun (6+ hours/day) or supplement with grow lights.
Over-fertilizing
Switch to a low-nitrogen fertilizer to encourage flowering.
Can I substitute potato fruit for tomatoes in recipes?
Potato fruit is a great tomato substitute in dishes like salsa, chutney, or stews. However, their flavor is more tart and less sweet than tomatoes. For balance, mix with bell peppers or a pinch of sugar. Warning: Avoid using in raw salads—always cook first!
Wrapping up and next steps
Growing and harvesting potato fruit (or Solanum tuberosum) safely is totally doable—just follow the right steps! You’ve now got the tools, tips, and answers to common questions to ensure a bountiful, edible harvest.
Whether you’re a backyard gardener or a curious beginner, this guide makes it simple to enjoy homegrown spuds with confidence.
Ready to take the next step? Start planting your seeds or tubers today—your future meals (and taste buds!) will thank you. 🌱✨