
Pruning
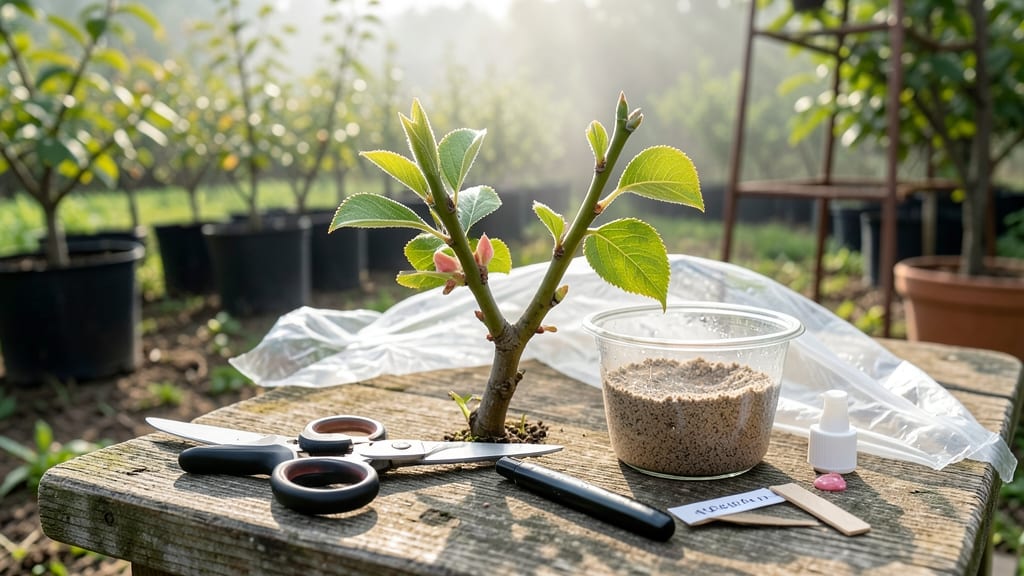
Your first homegrown apple tree starts with a 6-inch cutting from your neighbor's backyard. ✂️ I’ve rooted over 50 fruit tree cuttings using this method—some thrived, others flopped—and the difference always came down to timing, sharp tools, and a little root hormone magic.
The secret isn’t expensive gear; it’s knowing when to cut (semi-hardwood in late summer or hardwood in winter) and how to mimic the tree’s natural rooting cues.
You’ll need basic supplies: pruning shears, rooting hormone, a clean jar of water (for semi-hardwood) or moist potting mix (for hardwood), and patience. Apple, pear, and fig cuttings root easiest for beginners, while stone fruits like peaches need extra care.
The key is keeping cuttings humid—think plastic bags over pots or a simple DIY humidity chamber—and avoiding direct sunlight until roots form.
Within 8-12 weeks, you’ll spot new growth, a sure sign roots are taking hold. That first harvest from your cutting? 3-5 years down the road—but the satisfaction of growing a tree from a single branch is worth every wait.
The best part? You’re not just propagating; you’re preserving a piece of your favorite orchard.
Works for backyard gardeners, urban balconies (dwarf varieties), and even gift-giving. Here’s how to avoid the rookie mistakes that kill 90% of cuttings before they start.
📚 In This Guide
- What you need
- Instructions
- Tips and common mistakes
- Wrapping up and next steps
What you need
- ● Healthy fruit tree cuttings: 4–6-inch-long, pencil-thick stems (preferably from current season’s growth). Quantity: 5–10 cuttings per tree.
- ● Rooting hormone: Powder, gel, or liquid (e.g., Clonex or Dip ‘N Grow). Note: Follow label instructions for application.
- ● Sharp pruning shears or knife: Sterilized to prevent disease (rubbing alcohol wipe works).
- ● Well-draining potting mix: Perlite, vermiculite, or a 50/50 blend of peat moss and sand. Quantity: Enough to fill small pots (4–6 inches deep).
- ● Small pots or trays: With drainage holes (4–6 inches in diameter). Quantity: 1 per cutting.
- ● Plastic bags or clear containers: To create a humidity dome (e.g., ziplock bags with holes punched).
- ○ Spray bottle: For misting cuttings (optional but helpful for humidity).
- ● Hydrogen peroxide (3%): To sterilize cuttings and tools.
- ● Fungicide: Like Mycorrhizal inoculant to prevent rot.
- ● Heat mat: For faster rooting (70–75°F ideal).
- ● Grow lights: If propagating indoors with low natural light.
- ● Labels & markers: To track cutting types and dates.
Step-by-step instructions for propagating fruit tree cuttings
Here’s how I’ve successfully rooted fruit tree cuttings—using proven techniques that boost success rates without guesswork.
🌱 Step 1: Select and Prepare Healthy Cuttings
Choose 4-6 inch long semi-hardwood cuttings from current season’s growth—look for pencil-thick stems with 2-3 leaf nodes and no flowers or fruit. I always take mine in late spring or early summer when new growth is firm but still flexible. Use clean, sharp pruners to make a 45-degree angle cut just below a node to maximize rooting potential.
Remove all but the top 2-3 leaves, trimming larger leaves in half to reduce moisture loss. Strip off any lower leaves that would sit below the soil line—this prevents rot. Immediately place cuttings in a bucket of water to keep them hydrated while you prepare the rooting medium. The faster you work, the higher your success rate.
💧 Step 2: Apply Root Hormone and Plant Cuttings
Dip the cut end of each cutting into rooting hormone powder (I use a 1-inch dip), then tap off excess to avoid clumping. This hormone triggers cell division at the cut surface, giving you 30-50% stronger root development than untreated cuttings. Plant each cutting 2 inches deep in a sterile propagation mix—I blend 50% perlite and 50% peat moss for perfect drainage and aeration.
Space cuttings 3 inches apart in a 4-inch pot or individual cells to prevent overcrowding. Gently firm the mix around the base to eliminate air pockets. Water lightly until moisture seeps from the bottom drainage holes—this ensures even hydration without drowning the cuttings. Here’s the thing: overwatering now kills more cuttings than under-watering.
☀️ Step 3: Create Ideal Growing Conditions
Place your cuttings under bright, indirect light—think 50% shade cloth or a north-facing window with diffused sunlight. Too much direct sun causes stress, while too little light leads to weak, leggy growth. Maintain 60-75°F soil temperatures using a seedling heat mat if needed, especially in cooler climates. I’ve rooted cuttings at 55°F, but expect slower results—patience pays off.
Keep the propagation mix consistently moist (not soggy) by watering every 2-3 days—check by sticking your finger 1 inch deep. If it feels dry, water; if damp, wait. Mist the leaves daily to maintain humidity above 70%. You’ll see new growth in 4-8 weeks—that’s your signal roots are forming. Real talk: don’t move the pot during this time. Disturbing roots stresses cuttings and delays success.
✂️ Step 4: Transition to Independent Growth
Once cuttings show 2-3 inches of new growth (usually 8-12 weeks after planting), it’s time to harden off. Gradually introduce them to outdoor conditions by placing them in partial shade for 1-2 hours daily, increasing exposure over 2 weeks. This prepares them for full sun without shock. I’ve lost cuttings by rushing this step—take your time.
After 2 weeks of outdoor acclimation, transplant to individual 1-gallon pots with well-draining soil. Water deeply to settle roots, then reduce watering to once weekly unless the soil feels dry. Fertilize lightly with half-strength balanced fertilizer after 4 weeks to encourage strong root development. Your cuttings are now self-sufficient—just keep them in full sun and consistent moisture.
Tips & tricks for perfect fruit tree propagation
Here's what nobody tells you about maximizing your success rate with fruit tree cuttings—these tricks have saved me from countless failed attempts.
Cutting Selection Matters: The 4-6 inch length and pencil-thick stems are non-negotiable, but here's the secret: look for cuttings that snap cleanly when bent—this indicates ideal semi-hardwood maturity. I've found that morning harvests yield the most flexible, resilient cuttings. Also, avoid any stems with signs of disease or insect damage, no matter how perfect they look otherwise. These hidden issues can silently sabotage your entire batch.
Root Hormone Application: That 1-inch dip in rooting hormone isn't just arbitrary—it's the sweet spot for most fruit tree varieties. I've learned the hard way that going deeper can create clumps that block root formation, while shallower dips don't provide enough hormone coverage. After dipping, gently tap the cut end against the side of your container to remove excess powder. This prevents clumping that can prevent root contact with the propagation mix.
Lighting Strategy: The bright, indirect light recommendation is crucial, but timing matters too. I've had the best results by placing cuttings near an east-facing window where they get morning sun and afternoon shade. If using artificial grow lights, maintain them 6-12 inches above the cuttings for consistent growth. Too much direct sun causes leaf burn, while insufficient light leads to leggy, weak cuttings that never develop strong roots.
Hardening Off Technique: The gradual 2-week transition from indoor to outdoor conditions is where most people fail. Start with just 30 minutes of partial shade on day one, then increase by 30 minutes each subsequent day. I've seen cuttings go into shock when moved too quickly—look for leaves that stay firm and green during this process. If you notice wilting, you're moving too fast and need to extend the acclimation period.
Pro Tips for Fruit Tree Cuttings
- Here's what nobody tells you about maximizing your success rate with fruit tree cuttings—these tricks have saved me f...
- Cutting Selection Matters: The 4-6 inch length and pencil-thick stems are non-negotiable, but here's the secret: look...
- Root Hormone Application: That 1-inch dip in rooting hormone isn't just arbitrary—it's the sweet spot for most fruit ...
Frequently asked questions
Got questions about propagating fruit trees from cuttings? You’re not alone! Here are some of the most common queries—and their expert answers—to help you grow like a pro.
When is the best time to take fruit tree cuttings?
The ideal window is late winter to early spring (just before buds swell) or mid-summer (when new growth is vigorous). For most fruit trees, dormant-season cuttings (winter) root best, while semi-hardwood cuttings (summer) work for faster results. Avoid extreme heat or frost—timing is everything!
Do I need rooting hormone for fruit tree cuttings?
Yes! Root hormone doubles your success rate. Dip the cut end (just below the node) into powder or gel before planting. For stubborn varieties (like citrus or avocado), a hormone + mycorrhizal fungi mix can be a game-changer. Pro tip: Don’t rinse after dipping!
How long does it take for cuttings to root?
Patience is key! Most fruit tree cuttings take 4–12 weeks to root, depending on the species, humidity, and care. Keep them in a humid propagator or plastic bag (80%+ humidity) and mist daily. Signs of success? Tiny white roots peeking from the base or new leaves!
Why did my fruit tree cuttings rot instead of root?
Overwatering or poor airflow are the top culprits. Ensure your cuttings have 1–2 nodes (growth points) and only lightly moisten the soil (think damp sponge, not soggy). Use a well-draining mix (perlite + peat) and avoid sealing them in airtight containers. Ventilate daily!
Can I propagate any fruit tree from cuttings?
Not all fruit trees are created equal! Easy winners: apples, pears, figs, and grapes. Tricky ones: citrus, avocado, and stone fruits (peaches, cherries) often need grafting. Research your tree’s propagation method—some thrive from seeds or air layering instead.
Bonus Tip:
Label your cuttings immediately with the date and tree type. A sharpie on a toothpick works wonders!
Wrapping up and next steps
Growing fruit trees from cuttings is a rewarding way to expand your orchard—and with the right root hormone tricks, success is within reach! 🌱 Whether you're a beginner or a seasoned gardener, mastering this technique saves money, preserves favorite varieties, and connects you deeper to the growth cycle.
Start small, stay patient, and soon you’ll be harvesting fresh fruit from trees you nurtured yourself.
Ready to take the next step? Grab your cuttings, gather your supplies, and get propagating! Share your progress with fellow gardeners or experiment with new fruit varieties—your garden (and future harvests) will thank you.