
Trees
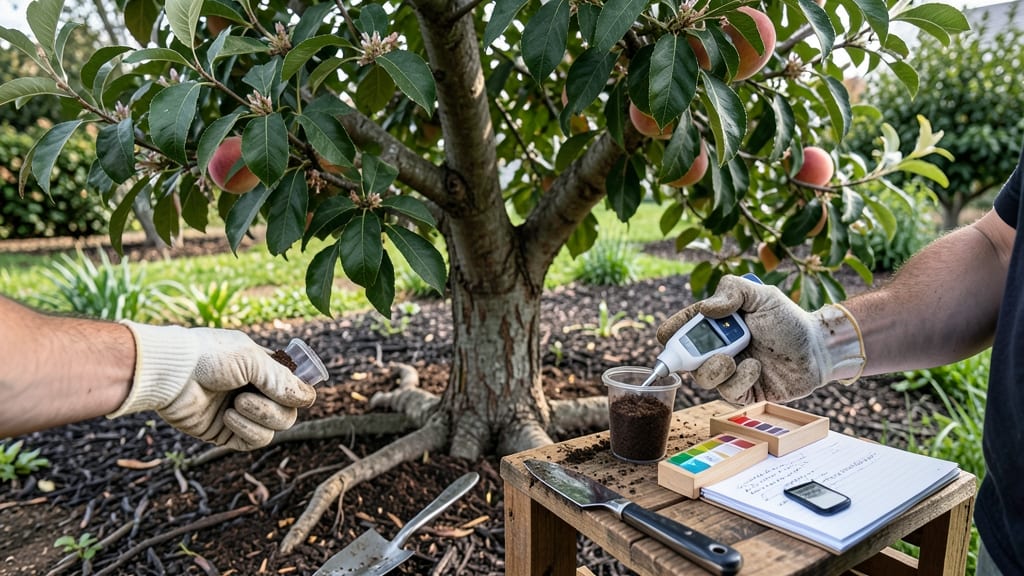
Your fruit trees' future harvests depend on soil testing for fruit trees—the right soil isn’t just about avoiding extremes, but about creating the perfect balance of nutrients and pH for peak growth. 🌱 I learned the hard way that guessing at soil conditions leads to stunted growth, bitter fruit, or even tree failure.
A simple soil test reveals exactly what your trees need to thrive, saving you time, money, and frustration.
The process is simpler than you'd think: grab a basic soil test kit (or send a sample to a lab for precision), dig samples from multiple spots under your tree, and follow the instructions to analyze pH and nutrients.
Most fruit trees prefer a slightly acidic range of 6.0 to 7.0, but some—like blueberries—demand 4.5 to 5.5. Without testing, you might be over- or under-fertilizing, wasting resources or harming your trees.
Once you get your results, amending the soil becomes straightforward. Too acidic? Add lime to raise the pH. Too alkaline? Sulfur or peat moss helps lower it. Nutrient deficiencies? A targeted fertilizer or compost blend fixes the issue.
Within a season, your trees will show you they’re happy—darker green leaves, stronger branches, and better fruit set—proving the test was worth every penny.
This method works for any fruit tree—apples, peaches, citrus, or even your backyard fig—no matter your climate. The key is testing every 2-3 years or when you notice problems like yellowing leaves or poor fruit production.
Now, let’s get those samples dug up and your trees on the path to their best harvest yet.
📚 In This Guide
- What you need
- Instructions
- Tips and common mistakes
- Wrapping up and next steps
What you need
- ● Soil testing kit – Choose a home soil test kit (e.g., Luster Leaf, MySoil) or a professional lab kit (mail-in services like blank">University Extension Labs). Lab kits offer more precise pH and nutrient analysis.
- ● Sampling tools: A soil probe (6–12 inches long) or a trowel for manual digging.
- ● A clean bucket (5-gallon preferred) for soil collection.
- ● Gloves – Disposable or reusable to keep samples clean.
- ● Plastic bags or airtight containers – For storing samples before testing (avoid metal containers).
- ● Measuring cup or scale – To collect 1–2 cups of soil per sample (adjust based on kit instructions).
- ● Map or grid system – To track sampling locations in your orchard (especially useful for large areas).
- ○ pH testing strips (optional but helpful) – For a quick pre-test before sending to a lab.
- ● Soil moisture meter – Ensures you test soil at the right moisture level (aim for damp but not soggy).
- ● Notebook or app – To log observations (e.g., tree health, location, soil texture).
- ● Reference guide – For interpreting results (e.g., blank">USDA Soil pH Chart for fruit trees).
- ● Amendments (post-test) – Lime (for acidic soil), sulfur (for alkaline soil), or compost (for nutrient boosts).
Step-by-Step instructions for testing soil before planting fruit trees
Accurate soil analysis is the foundation for fruit trees that thrive—here’s how to get precise results.
🌱 Step 1: Collect Representative Soil Samples
Use a clean trowel or soil probe to take 12-15 core samples from your planting area. Remove the top 2-3 inches of organic matter first—we want the mineral soil where roots will grow. Space samples 10-15 feet apart in a grid pattern to capture soil variability.
Mix the cores in a clean bucket, breaking up any clumps with your hands. You’ll need about 1 cup of this composite sample for testing. Label a sealed plastic bag with your location and date—soil changes over time, and you’ll want to compare results later. If your yard has multiple microclimates (sunny vs. shady spots), test each area separately.
💧 Step 2: Prepare the Sample for Testing
Let the sample air-dry for 24-48 hours at room temperature—this prevents mold growth during shipping. Once dry, crumble it with your fingers until it passes through a 1/4-inch mesh screen (or a clean coffee filter in a pinch). Discard any large debris like rocks or roots.
Place 1/2 cup of the screened soil into a labeled plastic bag. Moisten it slightly with distilled water (tap water can alter test results) until it holds together when squeezed but doesn’t form a puddle. Seal the bag tightly—this preserves the sample’s natural structure for accurate analysis.
☀️ Step 3: Choose and Submit Your Soil Test
Select a reputable lab—local agricultural extensions or certified testing services (like Ward Laboratories or A&L Great Lakes Labs) provide detailed reports for $15-$30. Request a test for pH, organic matter, nitrogen (N), phosphorus (P), potassium (K), calcium (Ca), magnesium (Mg), and micronutrients like zinc and iron. Fruit trees are finicky about micronutrients, so don’t skip them.
Fill out the lab’s form carefully. Note if your soil is sandy, clay, or loamy—this helps interpret results. Include your intended fruit tree varieties (e.g., apple, peach, citrus) so the lab can tailor recommendations. Most labs require 4-6 weeks for results, so order early—you’ll need this data before planting season.
✂️ Step 4: Interpret Results and Adjust Soil
Compare your pH to ideal ranges: apples and pears thrive at 6.0-6.5, peaches and plums prefer 6.0-7.0, and citrus demands 6.0-7.0 (but tolerates slightly acidic). If your pH is off, amend the soil 3-6 months before planting. For acidic soils, mix in elemental sulfur (follow package rates); for alkaline soils, use pelletized lime (apply based on lab calculations).
Check nutrient levels against your tree’s needs. For example, phosphorus deficiencies show as stunted growth, while potassium shortages lead to weak wood. If micronutrients like zinc or iron are low, apply chelated forms (like iron sulfate) directly to the planting hole. Re-test soil 6 months after amending to confirm adjustments worked.
🪴 Step 5: Monitor and Maintain Soil Health
After planting, test soil annually for the first 3 years—fruit trees establish slowly, and nutrient demands shift as they grow. Keep a soil journal noting amendments, rainfall, and tree responses. For example, yellowing leaves often signal iron deficiency, while brown leaf edges may mean excess salt from over-fertilizing.
Incorporate 2-4 inches of compost annually around the drip line (not the trunk) to replenish organic matter. Mulch with wood chips or straw to stabilize moisture and temperature. Avoid synthetic fertilizers until the tree is 2-3 years old—young roots are sensitive to salt buildup. If your test shows high organic matter (>5%), reduce compost applications to prevent nitrogen tie-up.
Tips & tricks for perfect soil testing before planting fruit trees
Precision soil testing isn't just about following steps—it's about avoiding common pitfalls that throw off results. Here's how to get the most accurate data every time.
Sampling Strategy: In Step 1, when collecting your 12-15 core samples, avoid the temptation to take fewer samples to save time. I learned this the hard way—skipping just 2-3 samples can miss critical soil variations, especially in yards with multiple microclimates. For example, a sunny southern exposure might show higher pH than a shaded northern area. Always test each distinct zone separately if your yard has varied sunlight patterns.
Screening Precision: The 1/4-inch mesh screen in Step 2 is non-negotiable for accurate testing. If you're short on time, don't substitute with a larger mesh—this lets through rocks and debris that can skew nutrient readings. For a quick alternative, a clean coffee filter works surprisingly well, though it may require more effort to break up stubborn clumps. The key is achieving uniform particle size that represents your actual soil structure.
Moisture Balance: When moistening your 1/2 cup sample in Step 2, this isn't about making it wet—it's about achieving the perfect "crumb test" consistency. Squeeze the soil gently: it should hold together when pressed but not form a puddle. Too much moisture alters mineral solubility, while too little doesn't properly represent field capacity. I've seen labs reject samples that were either too dry or too damp, so pay close attention to this detail.
Lab Selection: While most reputable labs cost between $15-$30, don't automatically choose the cheapest option. Some budget labs skip micronutrient testing, which is critical for fruit trees. Always verify they test for zinc, iron, and manganese—these elements often become limiting factors in fruit production. I've had clients waste months using generic soil reports that missed these key deficiencies.
Pro Tips for Soil Testing For Fruit Trees
- Precision soil testing isn't just about following steps—it's about avoiding common pitfalls that throw off results.
- Sampling Strategy: In Step 1, when collecting your 12-15 core samples, avoid the temptation to take fewer samples to save time.
- Screening Precision: The 1/4-inch mesh screen in Step 2 is non-negotiable for accurate testing.
Frequently asked questions
Got questions about soil testing for fruit trees?
You’re not alone! Here are the answers to the most common concerns—from timing to troubleshooting—so you can get your orchard on the right track.
How often should I test my fruit tree soil?
Test your soil every 2–3 years for established trees, or annually if you’re troubleshooting poor growth, yellowing leaves, or stunted fruit. New plantings should test before and after planting to monitor changes. Soil chemistry shifts over time, so regular checks ensure your trees stay healthy!
What’s the best time of year to test soil for fruit trees?
Test in early spring (before planting) or fall (after harvest) when soil is workable but not frozen. Avoid testing after heavy rain or right after fertilizing—wait 4–6 weeks for accurate results. Spring tests help plan pre-planting amendments, while fall tests guide winter prep.
Can I skip soil testing and just use generic fertilizer?
While generic fertilizer might work short-term, it’s a gamble. Soil tests reveal pH, nutrient deficiencies (like nitrogen, potassium, or magnesium), and toxic buildups (e.g., aluminum). Without testing, you risk over- or under-fertilizing, wasting money, or harming your trees. Think of it as a diagnostic tool—like a blood test for your orchard!
My fruit tree leaves are yellow—does that mean my soil is bad?
Yellow leaves (chlorosis) often signal iron, manganese, or zinc deficiency—common in alkaline soils (pH >7.0). But it could also be overwatering, poor drainage, or pests. Test your soil first! If pH is high, add chelated iron or sulfur to lower it. Pair testing with a visual inspection of roots and bark for a full picture.
What if my soil test shows “perfect” results but my tree still struggles?
Check for hidden issues:
- Root health: Girdling roots or compacted soil can strangle growth.
- Drainage: Waterlogged soil (even with good nutrients) causes rot.
- Pests/disease: Aphids, borers, or fungal issues (like fire blight) mimic nutrient problems.
- Sunlight/wind: Shady spots or harsh winds stress trees.
Wrapping up and next steps
Soil testing for fruit trees isn’t just science—it’s the secret ingredient to a thriving orchard! 🌱 By understanding your soil’s pH, nutrients, and texture, you’re already ahead of the game, setting the stage for healthier trees, sweeter fruit, and fewer headaches.
The next step? Take action! Whether you’re a backyard gardener or a small-scale farmer, grab those test results and adjust your soil plan—amend, mulch, or fertilize—before planting season kicks into high gear.
Your fruit trees will thank you with vibrant growth and bountiful harvests. Ready to dig in? Start testing today! 🌳✨